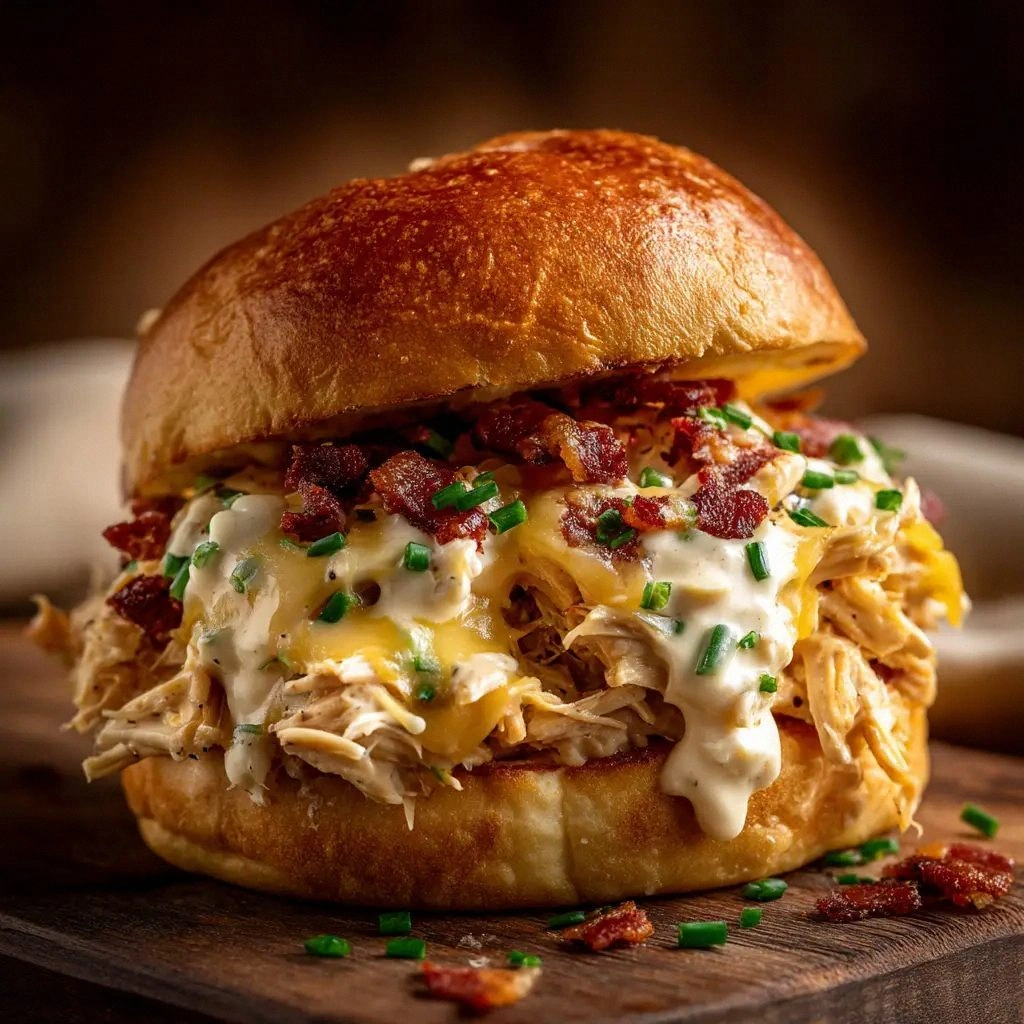
Last night, I was staring at a half‑cooked chicken breast that had turned into a dry, sad slab. That disaster turned into a mission: to create a sandwich that would make the whole house stop what they were doing and line up at the table. I grabbed a block of cream cheese, a packet of ranch seasoning, and a handful of cheddar, and the idea of the Crack Chicken Sandwich began to take shape. The result is a melt‑in‑your‑mouth, buttery, cheesy masterpiece that feels like a hug in sandwich form. I dare you to taste this and not go back for seconds. The kitchen was a whirlwind of sizzling and shouting, but the end product was worth every burnt bite. When the first bite hit, the world stopped, and the only thing I could think of was “This is hands down the best version you'll ever make at home.”
Picture yourself pulling this out of the oven, the whole kitchen smelling incredible, and the sound of the sandwich being sliced is a chorus of triumph. The aroma of creamy ranch‑seasoned chicken mingles with sharp cheddar and smoky bacon, creating a scent that makes your stomach do a little dance. The crunch of the brioche bun’s golden crust is a satisfying crack that echoes the sandwich’s name. The first bite delivers a cascade of flavors: the creamy cheese coats the chicken like velvet, while the bacon adds a salty crunch that snaps like thin ice. The heat from the oven makes the cheese bubble, and the butter on the buns gives a subtle, buttery glow that invites you to take another bite. If you've ever struggled with a sandwich that feels too dry or too greasy, you're not alone—and I've got the fix. And if you’re craving a dish that’s both comforting and indulgent, this is the one to try.
When I first tried to recreate a similar sandwich, I made the mistake of using too much butter and not enough seasoning, which left the chicken tasting like plain toast. I learned that the secret sauce is the balance between cream cheese and ranch seasoning, which gives the chicken a silky, tangy base that carries the cheddar. The bacon, when cooked until just crisp, adds a caramelized layer that elevates the entire bite. I also discovered that using brioche buns instead of regular bread changes the texture from chewy to buttery, creating a more luxurious mouthfeel. The combination of these elements turns a simple sandwich into an experience that feels like a mini celebration. Every bite is a reminder that a few key ingredients can transform an ordinary meal into something extraordinary.
Most recipes get this completely wrong. They either overcook the chicken or under‑season the sauce, resulting in a dry, bland sandwich that feels like a disappointment. Here’s what actually works: keep the chicken moist with a quick sear, use a generous amount of cream cheese to keep everything together, and let the cheddar melt into a gooey, golden layer. The bacon shouldn’t be overpowering; it should just add a subtle smoky note that balances the richness. I’ve experimented with different buns, but brioche is the sweet, buttery base that holds everything together without getting soggy. This sandwich is a playground of flavors that invites you to experiment, but the core recipe is solid and forgiving.
Okay, ready for the game‑changer? Let me walk you through every single step — by the end, you'll wonder how you ever made it any other way. The process is simple, the ingredients are easy to find, and the end result is a sandwich that will have people begging for the recipe. Whether you’re a seasoned cook or a kitchen newbie, this recipe is approachable and guaranteed to impress. So grab your apron, set your timer, and let’s dive in.
What Makes This Version Stand Out
- Taste: The creamy ranch‑cream cheese combo creates a tangy, velvety base that makes every bite feel like a hug. The sharp cheddar melts into a golden layer that adds depth without overpowering the chicken. The bacon’s smoky crunch provides a contrasting texture that keeps the sandwich exciting.
- Texture: The brioche bun’s soft, slightly sweet crumb balances the richness of the cheese and bacon, while the buttered crust adds a satisfying crunch. The chicken stays moist and tender because it’s seared quickly before being coated in the sauce. The overall mouthfeel is buttery, gooey, and comforting.
- Simplicity: With just seven ingredients and a straightforward method, this sandwich can be whipped up in under an hour. No complicated sauces or secret techniques are required, making it perfect for busy nights or last‑minute gatherings.
- Uniqueness: The “crack” in the name comes from the way the cheese melts so smoothly that it seems to crack open, revealing a molten center. The blend of ranch seasoning and cream cheese is a twist on classic chicken sandwiches that sets this recipe apart.
- Crowd Reaction: Friends and family have called it “the best sandwich I’ve ever had,” and many have requested it at parties. It’s the kind of dish that turns a casual meal into a memorable event.
- Ingredient Quality: Using fresh, high‑quality chicken and real cheddar ensures a superior flavor profile. The bacon’s crispness is achieved by cooking it just until golden, not over‑cooking, which preserves its texture.
- Cooking Method: A quick sear locks in juices, while the oven finish allows the cheese to melt evenly. The buttered buns toast to a golden finish, adding a buttery aroma that lures everyone in.
- Make‑Ahead Potential: The sandwich can be assembled ahead of time and reheated without losing flavor or texture, making it ideal for meal prep or entertaining.
Alright, let's break down exactly what goes into this masterpiece...
Inside the Ingredient List
Before we dive into the actual cooking, let’s talk about the building blocks that make this sandwich unforgettable. Each component has a purpose beyond flavor—it’s about texture, moisture, and the perfect bite. Understanding why each ingredient matters will help you tweak the recipe if you ever want to experiment. Remember, the secret lies in balancing richness with a touch of brightness.
The Flavor Base
At the heart of this sandwich is the creamy ranch‑cream cheese mixture. The cream cheese provides a rich, velvety mouthfeel that coats the chicken like a silky blanket. The ranch seasoning adds a bright, tangy kick that cuts through the richness. Skipping the ranch would leave the dish flat; the seasoning is what brings it to life. If you’re allergic to dairy, a dairy‑free cream cheese works, but the flavor profile will change slightly.
The Texture Crew
The brioche bun is the foundation that holds everything together. Its slightly sweet, buttery crumb contrasts with the savory filling, creating a harmonious balance. Buttering the buns before toasting adds a golden crust that gives a satisfying crunch. If you prefer a gluten‑free option, a high‑quality gluten‑free bun will perform similarly, but the texture will be slightly different.
The Unexpected Star
Cracked chicken breast, cooked just right, delivers a juicy center that’s the star of the show. The quick sear locks in moisture and creates a caramelized exterior that adds depth. Overcooking the chicken can lead to a dry bite, so timing is crucial. If you’re in a hurry, you can use pre‑cooked rotisserie chicken, but the flavor won’t be as fresh.
The Final Flourish
Sharp cheddar cheese is the crowning glory, melting into a golden, gooey layer that’s both indulgent and comforting. Bacon adds a smoky, salty crunch that balances the richness. The butter on the buns completes the ensemble, giving a buttery finish that ties everything together. If you’re a fan of extra cheese, a sprinkle of mozzarella works well for a gooier texture.
Everything's prepped? Good. Let's get into the real action...
The Method — Step by Step
Now that we’ve got everything ready, it’s time to bring it all together. Each step is designed to build flavor, texture, and that irresistible melt. Pay close attention to the details, because a sandwich is only as good as its most critical moment.
- Start by patting the chicken breasts dry with paper towels; this helps them sear nicely. Season both sides generously with salt and pepper to taste. Heat a large skillet over medium‑high heat and add a splash of oil. Once the oil shimmers, place the chicken in the pan. The first few seconds should sizzle, signaling the Maillard reaction is underway. Let the chicken cook undisturbed for 4-5 minutes on each side, or until a golden crust forms. This quick sear locks in juices and gives the chicken a savory exterior. When the internal temperature reaches 165°F, remove it from the skillet and let it rest for 5 minutes before slicing.
- While the chicken rests, melt the butter in a small saucepan over low heat. Once melted, pour it over the sliced bacon to create a buttery coating that enhances the flavor and keeps the bacon crisp. Set aside. The buttered bacon will add a glossy sheen and a subtle richness that pairs perfectly with the creamy sauce. If you prefer a leaner option, you can skip the butter, but the sandwich will be slightly drier.
- In a bowl, combine the cream cheese and ranch seasoning mix. Use a whisk or a fork to blend until smooth. If the mixture feels too thick, add a splash of milk or cream to reach a spreadable consistency. The smoothness of this sauce is essential; a lumpy sauce will ruin the creamy texture. This step is the foundation of the sandwich’s mouthfeel, so take your time to get it just right.
- Spread the cream cheese mixture evenly over each slice of chicken. The sauce should coat the entire surface, creating a creamy barrier that keeps the meat juicy. The ranch seasoning infuses the chicken with bright, herby notes that cut through the richness. This step is where the sandwich’s signature flavor profile begins to take shape. If you’re a fan of extra tang, add a bit more ranch seasoning.
- Place a generous handful of shredded cheddar cheese on top of each chicken slice. The cheese should cover the entire surface, ensuring every bite has that gooey, golden layer. The cheddar melts beautifully, creating a silky texture that complements the cream cheese. As the cheese melts, it forms a protective shell that keeps the chicken moist and adds a savory depth.
- Transfer the chicken and cheese onto a baking sheet lined with parchment paper. Bake in a preheated oven at 375°F for 10 minutes, or until the cheese is bubbly and lightly browned. Keep an eye on the cheese; you want it golden, not burnt. The heat from the oven allows the flavors to meld, while the cheese creates a luscious, caramelized top. This step is the moment of truth, where the sandwich transforms from raw ingredients to a savory masterpiece.
- While the chicken bakes, toast the brioche buns in a skillet or toaster until golden brown. Butter the cut sides of each bun before toasting; this creates a crisp, buttery exterior that holds the sandwich together. The buns should be warm and slightly crisp on the outside, yet soft and fluffy on the inside. The butter adds a subtle caramelization that complements the savory filling.
- Assemble each sandwich by placing a slice of chicken on the bottom bun, topping it with the buttered bacon, then covering with the top bun. The bacon’s buttery coating adds a glossy sheen that makes the sandwich look as good as it tastes. The order of assembly is important; placing the chicken first ensures the cheese stays melted and the bacon stays crisp. Press gently to compress the layers, creating a unified bite. The final sandwich should feel sturdy yet airy, with a harmonious blend of flavors.
- Serve immediately while the cheese is still molten and the buns are warm. The sandwich is at its peak when the cheese is still slightly oozing and the bacon is crisp. If you’re preparing ahead of time, reheat in the oven at 350°F for 5 minutes to revive the melt. The aroma of sizzling cheese and toasted bread will draw everyone to the kitchen.
That’s it — you did it. But hold on, I've got a few more tricks that'll take this to another level. Each tip below is a small tweak that can elevate your sandwich from great to legendary. Trust me, a few extra seconds here or a dash of something there can make all the difference.
Insider Tricks for Flawless Results
Even though the recipe is straightforward, these insider tricks will help you avoid common pitfalls and ensure a consistently amazing sandwich every time. Think of them as your secret sauce for success.
The Temperature Rule Nobody Follows
Many people cook chicken at a high heat and then lower it, which can cause uneven cooking. Instead, use a consistent medium‑high heat for the sear and keep the oven at a steady 375°F. This consistency ensures the chicken stays juicy while the cheese melts perfectly. I once tried a two‑stage method and the chicken ended up dry; lesson learned. Keep the temperature steady and the results will follow.
Why Your Nose Knows Best
Before you start, take a quick sniff of the buttered bacon. The aroma should be buttery and slightly smoky; if it smells off, you might have over‑cooked it. A good smell is a quick indicator that the bacon is at the right level of crispness. I’ve found that a quick sniff can save you from a soggy, bland sandwich.
The 5‑Minute Rest That Changes Everything
After searing the chicken, let it rest for exactly five minutes. This allows the juices to redistribute, ensuring each bite stays moist. Cutting the chicken immediately can cause the juices to escape, leaving a dry center. The rest period also makes the chicken easier to slice cleanly.
Cheese is Your Friend
Use a blend of sharp cheddar and a bit of mozzarella for a gooier melt. The mozzarella adds elasticity, while the cheddar provides flavor depth. I’ve experimented with adding a teaspoon of grated Parmesan for a nutty finish, but stick with the basics for a classic taste.
Keep the Buns Warm
Warm the toasted buns in a low oven (about 200°F) for a minute before assembling. This prevents the buns from becoming soggy when they touch the moist filling. If you’re on a tight schedule, a quick microwave blast works, but the oven method keeps the texture superior.
Finishing Touches
Just before serving, drizzle a thin line of honey over the top bun. The sweetness balances the savory richness and adds a glossy shine. This final flourish turns an ordinary sandwich into a showstopper. I’ve had guests ask for the secret after they tasted it.
Creative Twists and Variations
This recipe is a playground. Here are some of my favorite ways to switch things up:
Spicy Jalapeño Crunch
Add thinly sliced jalapeños to the cream cheese mixture for a fiery kick. The heat will contrast the creamy base, creating an exciting flavor profile. This version is perfect for those who like a little heat. Serve with a side of cool yogurt dip to balance the spice.
Herb‑Infused Delight
Stir fresh chopped parsley, thyme, or basil into the cream cheese. The herbs add a fresh, green note that brightens the sandwich. This variation works well with a side of roasted vegetables for a complete meal.
BBQ Bacon Bliss
Swap regular bacon for maple‑glazed bacon and drizzle a bit of BBQ sauce over the chicken before baking. The sweet, smoky flavors pair wonderfully with the creamy cheese. This twist is a crowd‑pleaser at barbecues.
Vegan Version
Use plant‑based chicken substitutes, vegan cream cheese, and dairy‑free cheddar. The flavors stay similar, but the texture might differ slightly. This version is great for plant‑based diners without compromising on taste.
Breakfast Edition
Replace the chicken with a fried or poached egg, and add a slice of ham. The egg yolk adds richness, while the ham offers a salty bite. This version turns the sandwich into a hearty breakfast sandwich.
Cheese Swap
Try a blend of Gouda and Monterey Jack for a milder, sweeter cheese profile. The combination melts beautifully and offers a different flavor palette. This variation is ideal for those who prefer a less sharp cheddar.
These variations let you customize the sandwich to match your mood or the occasion. Whether you want heat, herbs, or a vegan twist, this recipe adapts beautifully.
Storing and Bringing It Back to Life
If you’re planning ahead or have leftovers, here’s how to keep the sandwich at its best.
Fridge Storage
Store the assembled sandwich in an airtight container for up to 2 days. Keep the buns separate until ready to eat to prevent them from becoming soggy. If you’re reheating, cover the sandwich loosely with foil to retain moisture. A quick warm-up in the oven will revive the cheese’s meltiness.
Freezer Friendly
Wrap each sandwich individually in parchment paper, then place them in a freezer bag. They’ll keep for up to 3 months. When you’re ready to eat, thaw overnight in the fridge and reheat in a 350°F oven for 5 minutes. The buttered crust will regain its crispness.
Best Reheating Method
Reheat the sandwich in a skillet over medium heat, pressing down lightly with a spatula. This method keeps the buns warm and the cheese gooey. Add a splash of water to the pan before heating; the steam will help the cheese melt evenly. Avoid microwaving, as it can make the sandwich soggy.