I ruined Christmas last year. Not in the dramatic, movie-worthy sense — no trees toppled, no family feuds erupted — but in the quiet, devastating way that only a food blogger can manage: I showed up to the cookie exchange with sad, seized chocolate bark that looked like driveway gravel and tasted like disappointment. The crockpot I'd received as a wedding gift sat in the basement, still in its box, mocking me with every passive-aggressive blink of its digital display. Fast-forward twelve months: I'm the person who gets text messages starting November first begging for "those little peanut clusters that melt in your mouth like snowflakes on your tongue." The transformation came the night I decided to face my fear of slow-cooker candy, and what emerged three hours later was a tray of glossy, swirled beauties that made my neighbors audibly gasp. The secret wasn't some arcane technique or a $40 block of single-origin chocolate — it was simply treating the crockpot like a lazy, warm jacuzzi for chocolate instead of a cauldron of doom. Picture this: peanuts tumbling around in a gentle chocolate tide, the kitchen filling with the smell of roasted nuts and cocoa until it feels like you're living inside a candy shop run by indulgent elves. That first batch never made it to the exchange; my husband and I stood at the counter in our pajamas, plucking pieces straight off the parchment, burning our fingers and swearing we'd stop after "just one more." Reader, we finished the entire tray. If you've ever thought homemade Christmas candy required a candy thermometer, marble slabs, and the steady nerves of a bomb technician, stay with me — because this recipe is about to become the easiest holiday miracle you ever pull off.
Most recipes for slow-cooker candy treat the machine like a glorified double boiler, dumping everything in and hoping for the best. They forget that crockpots have hot spots, that peanuts can go from toasted to bitter in minutes, that chocolate needs coaxing, not bullying. I learned the hard way that layering matters, that peanuts on the bottom act like tiny ball-bearings keeping the chocolate from scorching, that a final ten-minute "nap" off the heat lets everything relax into glossy perfection. The first time I nailed it, I actually danced around the kitchen — imagine a slightly caffeinated penguin — because the candy looked exactly like the glossy $24-a-pound version from the fancy confectioner downtown. But mine cost pocket change and filled the house with the kind of aroma that makes carolers spontaneously appear on your porch. If you've ever struggled with chocolate that blooms into an ugly white freckle two days later, or candy that tastes fine but looks like it survived a hailstorm, this is the recipe that ends the streak. And now the fun part: we get to build it together, one decadent layer at a time.
Before we dive in, let me set the scene for victory. Clear off a counter big enough for sheet pans lined with parchment — you'll need real estate for quick scooping once the chocolate is molten. Plug your crockpot into a switched outlet strip if you have one; being able to kill the heat instantly is a superpower you won't regret. And open a window just a crack — not because anything will burn, but because the smell of warm chocolate and salty peanuts is so intoxicating you'll want to bottle it as perfume. Ready for the game-changer? We're using both almond bark and real chocolate chips, a one-two punch that gives snap, shine, and that slow melt that coats your tongue like velvet. Okay, ready? Let me walk you through every single step — by the end, you'll wonder how you ever made it any other way.
What Makes This Version Stand Out
Silky Snap: The mix of almond bark and real chocolate creates a candy that breaks with a satisfying crackle yet melts the second it hits your tongue — no waxy aftertaste, no chalky streaks. Most recipes lean too hard on candy coating and end up tasting like birthday candles.
Salty-Sweet Balance: Dry-roasted peanuts bring a deep, savory note that makes the chocolate taste fruitier and more complex. It's like adding a pinch of flake salt without the fear of over-salting — the nuts do the work for you.
Hands-Off Luxury: Once everything's in the pot, you stir exactly three times over ninety minutes. That's it. No hovering, no thermometer angst. Go wrap presents, sip mulled wine, or binge Hallmark movies while the crockpot does elf duty.
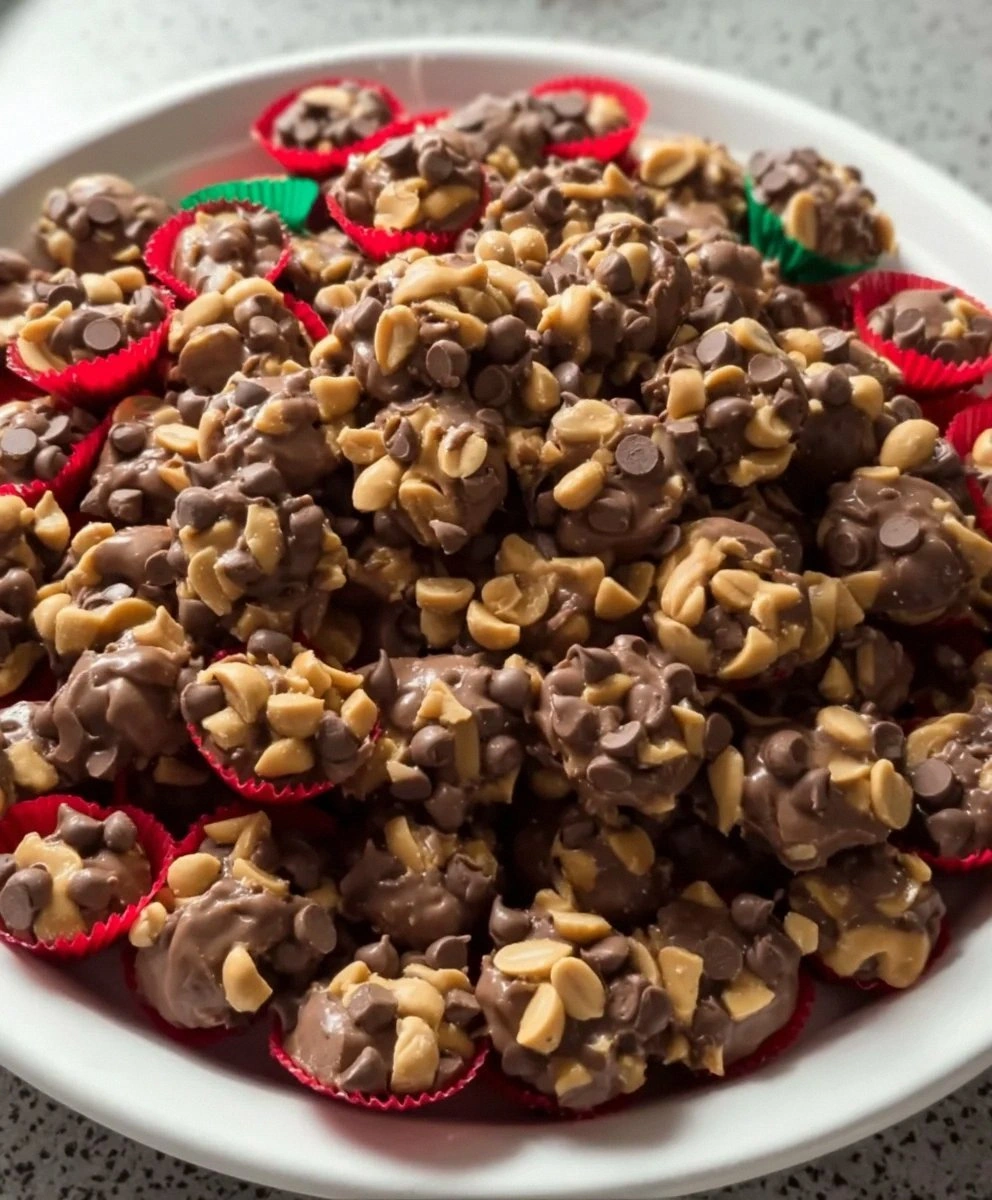
Gift-Ready Glamour: The finished candy looks artisanal — glossy ripples, peanut-studded tops, those perfectly imperfect edges that say "someone loved you enough to stand over a double boiler for hours," except you didn't.
Make-Ahead Magic: Stored in a tin at cool room temperature, these clusters stay pristine for two weeks. The flavor actually improves after day three as the salt migrates into the chocolate and the peanuts mellow.
Infinitely Customizable: Swap peanuts for pecans, add crushed candy canes for stripes, drizzle with white chocolate for snow-capped peaks — the base recipe is a blank canvas that plays nice with every holiday whim.
Crowd Reaction Guarantee: I dare you to set out a tray at a party and not hear someone moan, "What's IN these?" within five minutes. They're the first thing to vanish from cookie platters and the last thing people forget.
Alright, let's break down exactly what goes into this masterpiece...
Inside the Ingredient List
The Flavor Base
Dry-roasted peanuts aren't just a convenience item; they're pre-loaded with toasty, Maillard-rich depth that raw nuts can't fake. When they warm gently in the crockpot, their natural oils migrate into the chocolate, creating a peanut-infused candy base that tastes like you've been slaving over a double boiler for hours. Skip the honey-roasted kind — the sugary coating will scorch and turn bitter. If you're feeling fancy, substitute lightly salted cocktail peanuts and omit any added salt later; the faint brine amplifies chocolate's fruity notes like a backstage spotlight.
The Texture Crew
Almond bark gets a bad rap from snobby chocolatiers, but here's the truth: it provides snap, shine, and shelf stability that even the best couverture can't match on its own. Think of it as the scaffolding that keeps your candy gorgeous in gift tins for two weeks. Milk chocolate chips bring the creamy sweetness that makes kids' eyes light up, while dark chocolate chips give a grown-up bitterness that keeps the candy from cloying. Together they create a three-dimensional chocolate experience — first the sweet hug, then the complex linger.
The Unexpected Star
Here's the twist no one sees coming: a teaspoon of neutral oil (think canola or refined coconut) thins the chocolate just enough to coat every peanut in a whisper-thin, glossy shell. Without it, you're wrestling thick puddles that set up chunky and dull. The oil also prevents the dreaded chocolate bloom — those streaky white freckles that make candy look ancient even when it's fresh. If you skip this, you'll still have tasty clusters, but they'll look like they've been in Grandma's attic since 1997.
The Final Flourish
Sea salt flakes sprinkled on top while the candy is still tacky accomplish two things: they add pops of crunch and they make the chocolate taste more chocolaty thanks to the same science that makes watermelon sweeter with a pinch of salt. Use the flaky stuff, not table salt; you want dramatic shards that catch twinkle lights like tiny mirrors. If you're shipping tins cross-country, add these right before gifting so they stay perky, not soggy.
Everything's prepped? Good. Let's get into the real action...
The Method — Step by Step
- Start by creating a peanut blanket at the bottom of your crockpot — dump in the dry-roasted peanuts and shake the vessel gently so they form a single, even layer. This isn't busywork; the nuts act as ball-bearings, keeping the chocolate from direct contact with the hottest spots and preventing that burnt ring of tragedy around the edge. Take a moment to inhale — they already smell like baseball games and county fairs, and they haven't even warmed up yet. If you spot any sad, shriveled specimens, flick them out; nobody wants bitter in their bliss.
- Now the chocolate avalanche: break the almond bark into random shards — no need for ruler-perfect squares — and scatter them over the peanuts. Follow with the milk chocolate chips, then the dark, creating a marbled mosaic that looks almost too pretty to cover. Resist the urge to stir; layering matters here. The almond bark, with its higher melting point, needs to be closest to the heat source so it can liquefy and cascade downward, enveloping the peanuts in a glossy tide. Put the lid on, set the crockpot to LOW, and walk away for forty-five minutes. Seriously, set a timer and go do something festive — this is hands-off territory.
- When the timer dings, lift the lid and behold the transformation: the top layer of chips still holds its shape, but underneath a molten chocolate river is quietly bubbling. Grab a heatproof spatula and fold everything together using slow, wide arcs, scraping the sides where hotter pockets hide. You want every peanut wearing a shiny chocolate coat, no streaks of naked nuts complaining they didn't get invited to the party. The mixture will look thin and almost soupy — that's perfect. Replace the lid and set another forty-five-minute timer; the chocolate needs time to relax and marry flavors.
- While you wait, prep your landing zone: line two sheet pans with parchment, anchoring the corners with tiny dabs of the soon-to-be-melted chocolate — it's like edible tape that keeps the paper from sliding when you scoop. Clear a flat spot in your fridge or on a cool counter; warm candy takes forever to set and will develop that cloudy bloom if it cools too slowly. This is also the moment to fish out your cutest mini cupcake papers if you're gifting individual clusters; they make the candy look boutique-bought and keep sticky fingers at bay during the inevitable raids.
- After the second timer, peek again — the mixture should look glossy and lava-like, with peanuts bobbing like tiny rafts. Stir in the neutral oil now; it will thin the chocolate just enough to coat a spoon in a sheer curtain. Drop a scant teaspoon onto your parchment; if it holds a soft mound and begins to set within two minutes, you're golden. If it puddles into a sad puddle, let the crockpot run another ten minutes so slightly more moisture evaporates. Patience here is the difference between elegant candy blobs and chocolate soup that never quite firms up.
- Now the fun part: use two spoons (or a small cookie scoop if you're fancy) to drop walnut-sized mounds onto the prepared sheets, keeping them about an inch apart — they won't spread much, but air circulation helps them set faster. Work quickly; as the candy cools it thickens, and you want glossy tops, not rocky crags. If you notice the mixture stiffening, flick the crockpot back to LOW for thirty seconds to loosen things up — think of it as a chocolate espresso shot that perks everything back to pourable perfection.
- While the clusters are still tacky, shower them with flaky sea salt so it adheres like glitter on glue. Less is more; you want tiny white shards that catch the light, not a salt lick. Let the trays sit at room temperature for twenty minutes, then slide them into the fridge for a final ten-minute flash-chill. This rapid set locks in shine and gives you that satisfying snap when you break a cluster in half. Once firm, peel the candies off the parchment and store them in a tin, layered between wax paper, in a cool spot — unless you plan to eat them all while standing in the glow of the fridge, which, honestly, I support.
That's it — you did it. But hold on, I've got a few more tricks that'll take this to another level...
Insider Tricks for Flawless Results
The Temperature Rule Nobody Follows
Chocolate sets best between 65 and 70°F — any warmer and you get sticky fingerprints; any colder and the surface can bloom into dusty white freckles. If your kitchen runs hot from holiday baking marathons, stash the finished tins in the coolest bedroom closet, not the steamy kitchen. A friend once kept hers above the radiator and wondered why they turned gray and blotty after two days; don't be that friend.
Why Your Nose Knows Best
When the candy is perfectly toasted, your kitchen will smell like a peanut butter cup making out with a cocoa bean — nutty, sweet, slightly caramel. If you catch even a whiff of scorched bitterness, immediately ladle the mixture into a cold bowl; chocolate continues cooking from residual heat and can go from dreamy to dreadful in minutes. Trust your olfactory alarm system — it's saved more batches than any timer.
The 5-Minute Rest That Changes Everything
After the final stir, let the mixture sit uncovered for five minutes before scooping. This brief rest allows stray air bubbles to rise and pop, leaving you with glassy, professional-looking tops. Skip it and your candies will have tiny pinholes that look like lunar craters under twinkle lights — still tasty, but not gift-worthy photogenic.
Spoon Size = Wow Factor
Use a rounded teaspoon for bite-size clusters that fit inside mini cupcake papers, or a tablespoon for statement pieces that look like artisanal bakery gems. My secret weapon is a small cookie scoop with a squeeze release — it forms perfect domes faster than Santa sliding down a chimney. Uniform size also means uniform setting time, so you won't have some candies rock-hard while others ooze like molten lava cakes.
Salvage the Last Drops
When the crockpot is almost empty, pour in a splash of hot milk, whisk like mad, and you've got the most decadent hot chocolate imaginable. Add a shot of peppermint schnapps for adults or a swirl of whipped cream for kids — zero waste, maximum joy. I've honestly made entire batches just for the dregs because that elixir is liquid Christmas.
Creative Twists and Variations
This recipe is a playground. Here are some of my favorite ways to switch things up:
Peppermint Bark Clusters
Swap half the dark chocolate chips for white chocolate, then stir in a quarter teaspoon of peppermint extract with the oil. Crush four candy canes in a zip-top bag with a rolling pin and sprinkle the dusty pink shards over the clusters right after salting. The result tastes like sledding downhill on a snowy night — brisk, sweet, exhilarating.
Spicy Mexican Hot Chocolate
Add a fat pinch of cayenne and a teaspoon of ground cinnamon to the peanut layer before the chocolate goes in. The gentle heat blooms slowly, so guests taste chocolate first, then feel a warm hug that lingers like a holiday toast. Top with gold sanding sugar for a glittery finish that looks like fiesta lights.
Coconut Snowball Edition
Stir in a cup of toasted unsweetened coconut flakes during the final mix; they cling to the chocolate like tiny hammocks. After setting, roll the clusters in more coconut so they look like miniature snowballs. Close your eyes when you bite and you can almost hear reindeer hooves on the roof.
Salted Caramel Crunch
Fold in a half-cup of crushed pretzel sticks along with the peanuts for a sweet-salty crunch that shatters like thin ice. Drizzle cooled clusters with store-bought caramel and let it set into amber ribbons. Fair warning: these disappear faster than cookies for Santa, so hide a few for yourself.
Double-Decker Peanut Butter
Once the clusters are set, melt a cup of peanut butter chips with a teaspoon of coconut oil and drizzle over the tops. The resulting candy tastes like the love child of a peanut butter cup and a chocolate-covered pretzel — pure nostalgia in a single bite.
Cherry Cordet Remix
Stir in a half-cup of dried cherries during the final mix; they plump slightly from the heat and turn into chewy jewels. Add a drop of almond extract to echo the cherry flavor and finish with slivered almonds for extra crunch. It's like eating a chocolate-covered cherry without the sticky liquid center explosion.
Storing and Bringing It Back to Life
Fridge Storage
Keep clusters in an airtight tin between sheets of wax paper; they'll stay snappy for two weeks. Avoid plastic containers — they trap moisture and can bloom the chocolate into ghostly streaks. If your kitchen creeps above 72°F, park the tin in the fridge door, but let candies come to room temp for ten minutes before serving; cold chocolate tastes dull and waxy on the tongue.
Freezer Friendly
Freeze in a single layer on a tray first, then transfer to a zip-top bag with the air squeezed out. They'll keep for three months and thaw in minutes on the counter. Pro move: stash a bag behind the frozen peas — out of sight from the candy gremlins who raid the kitchen at midnight.
Best Reheating Method
If your candy softens from a warm kitchen, pop the tray into the fridge for ten minutes to re-firm. Never reheat in the microwave — it melts the chocolate unevenly and can seize it into a grainy mess. A quick chill restores snap and shine, making them gift-ready again in the time it takes to wrap a present.