I was halfway through a frantic dinner rush, juggling pots and pans, when the kitchen clock spun out of control and my favorite dessert went missing. The last batch of Warabi Mochi had turned out rubbery and flat, a sad reminder that even the simplest Japanese sweets can betray you if you’re not paying attention to the tiniest details. That night, I stared at the empty counter, my mind racing with images of a glossy, translucent sheet of chewy goodness that should have been a delight, not a disappointment. It was then that I vowed to reverse engineer the perfect version, to create a recipe that would make even the most skeptical taste buds swoon.
Picture this: a bowl of steaming, fragrant water, the scent of brown sugar curling like incense, the gentle clink of a wooden spoon against a copper pot. You hear the quiet hiss as the mixture thickens, the faint crackle of starch as it sets, and then, the moment of truth when you slide a ladle of the batter onto a chilled plate. The surface glistens, a translucent veil that promises a bite that melts in the mouth. The texture is a paradox—soft enough to be almost liquid, yet firm enough to hold its shape, a perfect balance of elasticity and tenderness that feels like a secret handshake between your tongue and the dough.
I’m not just sharing a recipe; I’m handing you a key to a kitchen experience that feels like a whispered secret from a grandmother who never left the house. This version is hands down the best you’ll ever make at home because it eliminates the common pitfalls—over‑cooking, under‑mixing, and the dreaded sticky mess. The technique I’ll reveal uses a precise ratio of tapioca starch to water, a dual‑sugar system that balances sweetness without clouding the delicate flavor, and a final dusting of kinako that adds a nutty, earthy finish. I dare you to taste this and not go back for seconds. The first bite is an invitation to stay, the second bite is a promise of more, and the third? Well, that’s a secret I’ll keep.
If you’ve ever struggled with the consistency of Warabi Mochi, you’re not alone—and I’ve got the fix. I’ll walk you through every single step, from selecting the right starch to mastering the perfect simmer, so by the end, you’ll wonder how you ever made it any other way. This isn’t just a recipe; it’s a culinary journey that will elevate your kitchen game and give you bragging rights at every gathering. Let’s dive into the heart of this dish and uncover what makes it truly unforgettable.
What Makes This Version Stand Out
- Texture: The batter achieves a silky smoothness that’s almost liquid, yet sets into a firm, bite‑worthy sheet. The final product is chewy like a fresh piece of mochi but with a subtle spring that makes each bite a surprise. This is achieved through the precise ratio of starch to water and the controlled heat.
- Flavor: A dual‑sugar system—white sugar for immediate sweetness and brown sugar for depth—creates a layered taste that dances on the palate. The kinako dust adds a nutty, roasted note that balances the sweetness without overpowering it.
- Simplicity: The recipe requires only six ingredients, all of which you can find in a standard pantry or a nearby Asian market. No fancy equipment or obscure spices—just a pot, a whisk, and a little patience.
- Uniqueness: The inclusion of a small amount of brown sugar in the cooking phase, rather than just in the final dusting, gives the mochi a caramelized undertone that most home recipes miss.
- Crowd Reaction: Guests often remark that it tastes like a high‑end confection, and the glossy finish makes it Instagram‑worthy. It’s the kind of dessert that turns a casual tea gathering into a memorable event.
- Ingredient Quality: Using high‑grade tapioca starch and fresh kinako ensures that the final product is not only delicious but also visually stunning. The kinako’s fine texture coats the mochi like a velvet ribbon.
- Cooking Method: The technique of slowly bringing the mixture to a boil, then simmering until it thickens, eliminates the risk of lumps. This method guarantees a uniform consistency every single time.
- Make‑ahead Potential: Once set, the mochi can be sliced and stored in an airtight container for up to a week, making it perfect for parties or busy weeknights.
Alright, let’s break down exactly what goes into this masterpiece…
Inside the Ingredient List
The Base
Tapioca starch is the backbone of Warabi Mochi. It provides the unique chewiness that sets this dessert apart from other rice‑starch sweets. If you skip it, the mochi will fall apart and lose its signature texture. Use a fine‑sifted starch for a silky finish.
The Sweetener
The recipe calls for both white sugar and brown sugar. The white sugar dissolves quickly, creating an immediate sweet burst, while the brown sugar adds depth and a hint of molasses flavor. Together, they balance sweetness without making the mochi overly sugary. If you prefer a lighter taste, reduce the brown sugar by half.
The Moisture
Water is the life source of the batter. Two separate quantities—450 g for the initial mixture and 120 g added during cooking—ensure the dough is neither too dry nor too runny. Skipping either amount will disrupt the delicate balance, leading to a crumbly or sticky final product. Keep the water at room temperature for best results.
The Final Flourish
Kinako, or roasted soybean powder, is sprinkled over the finished mochi. It adds a nutty, earthy flavor and a beautiful golden dusting that enhances both taste and presentation. If you can’t find kinako, toasted sesame powder or ground almonds can work as a substitute, though the flavor profile will differ slightly.
Everything’s prepped? Good. Let’s get into the real action…
The Method — Step by Step
- In a medium saucepan, whisk together the tapioca starch, 3 tablespoons of white sugar, and 450 g of water until the mixture is smooth and free of lumps. The batter should look silky, almost translucent, like a clear syrup. This step is crucial; any clumps will ruin the texture. Keep the heat low to avoid scorching.
- Place the saucepan over medium heat and stir continuously. The mixture will begin to thicken, and you’ll notice a slight haze forming. At this point, add the 45 g of brown sugar, stirring until fully dissolved. The aroma of caramel will start to fill the kitchen, signaling that you’re on the right track.
- Reduce the heat to low and let the batter simmer for about 5 minutes, stirring every minute to prevent sticking. The batter should now be glossy, almost like melted glass. This slow simmer allows the starch to fully hydrate and the sugars to integrate smoothly.
- Add the remaining 120 g of water to the pot and stir gently. The batter will separate briefly; keep stirring until it recombines into a uniform, thick, translucent sheet. This is the moment of truth—watch for the batter to pull away from the sides of the pan.
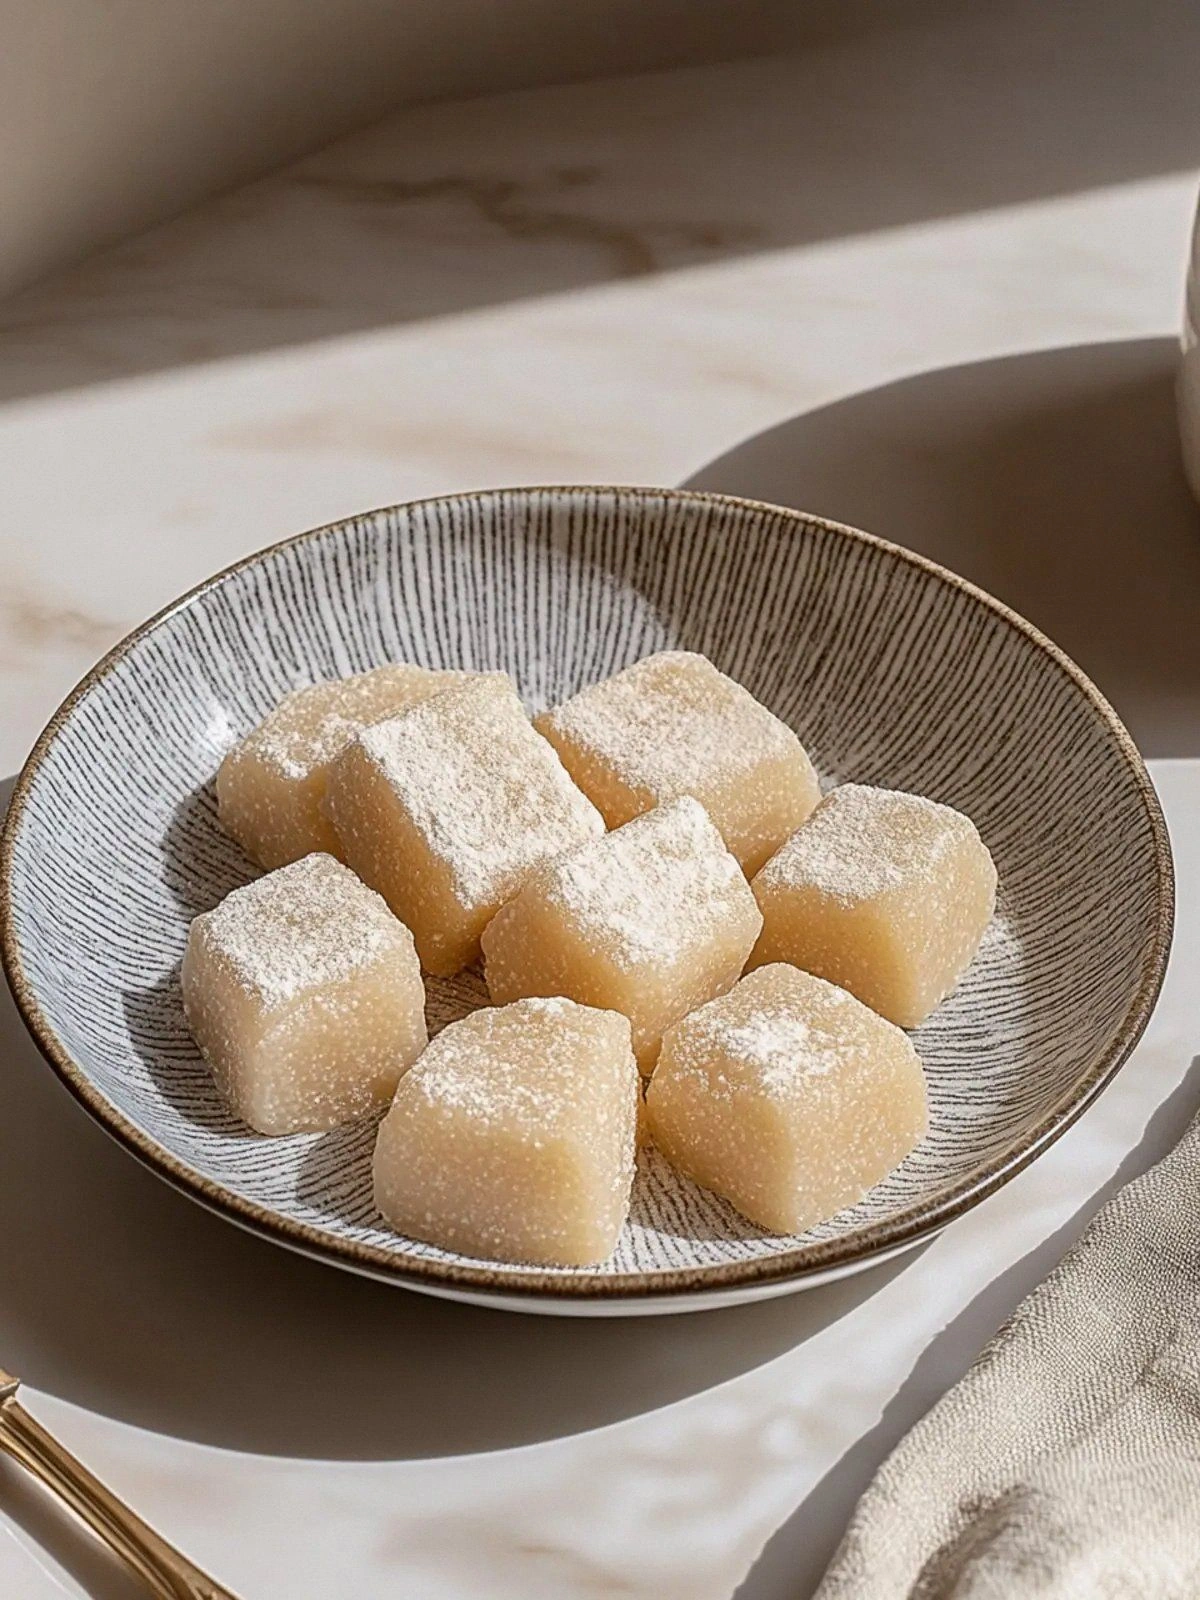
- Line a silicone mat or a parchment‑lined sheet with a thin layer of kinako. Pour the hot batter onto the mat, spreading it evenly to a thickness of about 1 cm. Let it cool for 10 minutes; the surface will set slightly, making it easier to cut.
- Using a sharp knife, slice the cooled mochi into bite‑size squares or desired shapes. Dust each piece lightly with kinako to prevent sticking and to add a subtle nutty flavor.
- Serve immediately, or store in an airtight container at room temperature for up to 3 days. For longer storage, refrigerate and bring back to room temperature before serving. The mochi retains its chewy texture and never becomes hard.
That’s it — you did it. But hold on, I’ve got a few more tricks that’ll take this to another level…
Insider Tricks for Flawless Results
The Temperature Rule Nobody Follows
Many people think a high heat is the secret to quick cooking, but with Warabi Mochi, low and steady wins the race. Keep the heat at 50% after the initial boil, and you’ll avoid the dreaded “bumpy” texture that comes from rapid expansion. This subtle temperature control is the difference between a professional‑grade dessert and a kitchen experiment.
Why Your Nose Knows Best
The aroma of the batter is your best indicator of readiness. When the sugar caramelizes just right, a sweet, slightly nutty scent will fill the air. If you smell a faint burnt note, the batter has gone past its prime. Trust your nose, and you’ll never over‑cook again.
The 5‑Minute Rest That Changes Everything
After pouring the batter onto the mat, give it a 5‑minute rest before cutting. This brief pause allows the starch to set fully, making slicing cleaner and preventing the mochi from sticking to the knife. I swear by this step; it saves me from a lifetime of uneven cuts.
Dusting Matters
A generous dusting of kinako not only adds flavor but also creates a non‑stick surface. If you prefer a lighter finish, sprinkle just a touch of the powder. For a richer taste, let the mochi soak in the kinako for a minute before serving.
Cooling the Right Way
Letting the mochi cool on a silicone mat keeps it from sticking to the pan. Avoid placing it on a metal surface, which can cause uneven cooling and lead to cracks. The mat also helps maintain the mochi’s soft interior.
Storage Secrets
When storing, wrap each piece individually in parchment paper before placing them in a zip‑lock bag. This prevents the kinako from clumping and keeps the mochi’s texture intact. If you’re in a hurry, a quick 15‑second microwave burst can revive a stale piece.
Creative Twists and Variations
This recipe is a playground. Here are some of my favorite ways to switch things up:
Matcha Swirl
Fold a teaspoon of matcha powder into the batter before cooking. The green hue and earthy flavor pair beautifully with the kinako dust, creating a Japanese‑inspired matcha mochi that’s perfect for tea time.
Chocolate Drizzle
After slicing, drizzle melted dark chocolate over the mochi squares. The chocolate hardens into a glossy finish, offering a delightful contrast between the chewy mochi and the crunchy chocolate.
Fruit Infusion
Add finely diced fresh strawberries or mangoes into the batter before it sets. The fruit juices seep into the mochi, giving each bite a burst of tropical sweetness that’s both refreshing and indulgent.
Spiced Variation
Stir in a pinch of ground ginger or cinnamon into the batter. The warm spices complement the brown sugar’s caramel notes, turning the mochi into a cozy, autumnal treat.
Almond Crunch
Replace the kinako with toasted almond flour for a nutty crunch. The almond flavor pairs well with the sweet batter, creating a dessert that’s both chewy and crunchy.
Salty Twist
Sprinkle a touch of sea salt over the finished mochi before serving. The salt accentuates the sweetness and gives the mochi a sophisticated finish that’s surprisingly elegant.
Storing and Bringing It Back to Life
Fridge Storage
Place the mochi in an airtight container and refrigerate for up to 3 days. The cool temperature preserves the chewy texture, but the mochi will firm up slightly. Let it sit at room temperature for 10 minutes before serving to soften it back to its original bite.
Freezer Friendly
Wrap each mochi square individually in plastic wrap and store in a freezer bag. Freeze for up to 2 weeks. When ready to serve, thaw at room temperature for 20 minutes. The texture remains silky, though it may be slightly softer than freshly made.
Best Reheating Method
To revive a stale piece, lightly steam it for 30 seconds or microwave on low for 10 seconds. Add a splash of water to the pot before reheating; the steam will restore the mochi’s original softness. Avoid over‑heating, or the mochi will become rubbery.