Picture this: you’re standing in a cramped kitchen, the air thick with the scent of sugar and butter, and your phone buzzes with a frantic text from a friend who just discovered a new chocolate craze. “You have to try these red velvet brownies I saw on Instagram,” it reads, and before you can even ask for the recipe, you’re already scrolling through the endless scroll of glossy photos. I’m telling you, the moment I tasted the first bite was a full‑scale culinary revelation—velvet‑soft, chocolate‑rich, and that unmistakable hint of citrus that only a splash of vanilla can bring. If you’ve ever dreamed of a brownie that feels like a decadent dessert in one bite, you’re in the right place.
The first thing that hits you is the aroma—sweet, buttery, with a faint, comforting note of cocoa that makes you think of a cozy winter evening. The sound of the batter being poured into the pan is almost hypnotic, a rhythmic clink that promises something sweet. When you take that first bite, the texture is a paradox: the exterior is slightly crisp, the interior melts like silk, and the frosting’s smoothness creates a contrast that’s almost cinematic. That instant burst of flavor, followed by the lingering, sweet aftertaste, is what turns a simple dessert into a memory.
What sets this recipe apart isn’t just the ingredients—though they’re all top‑tier—but the way they interact. I’ve spent hours tweaking the ratios, experimenting with the exact amount of butter and sugar, and the final result is hands down the best version you’ll ever make at home. The red food coloring isn’t just for looks; it subtly enhances the cocoa’s depth, giving the brownies a richer, more complex profile. And the cream cheese frosting? It’s silky, tangy, and the gingerbread sprinkles add a playful crunch that makes every bite a surprise.
I dare you to taste this and not go back for seconds. Picture yourself pulling this out of the oven, the whole kitchen smelling incredible, and then seeing the glossy, perfect square cut out of a pan that looks like it belongs in a high‑end bakery. Let me walk you through every single step—by the end, you’ll wonder how you ever made it any other way.
What Makes This Version Stand Out
- Taste: The combination of golden brown sugar and cocoa creates a caramelized, slightly bitter undertone that balances the sweetness of the frosting. The vanilla extract adds a subtle warmth that lingers on the palate.
- Texture: The brownies boast a crisp edge that gives way to a moist, dense center, while the frosting provides a creamy, airy finish that melts in your mouth.
- Simplicity: With only ten ingredients, this recipe is easy to follow, even for the most novice bakers. No advanced techniques required—just trust the process.
- Uniqueness: The use of red food coloring not only gives the brownies their signature hue but also intensifies the flavor profile, creating a visual and gustatory experience that’s truly unique.
- Crowd Reaction: Friends who’ve tasted these brownies always ask for the recipe. The combination of color, flavor, and texture makes it a showstopper at gatherings.
- Ingredient Quality: Every component—from the salted butter to the premium cocoa powder—contributes to a richer, more satisfying dessert.
- Cooking Method: Baking at a moderate temperature preserves the moisture while ensuring a golden crust, giving you a brownie that’s both decadent and well‑structured.
- Make‑ahead Potential: Once cooled, the brownies can be stored in an airtight container for up to a week, making them ideal for parties or quick snack fixes.
Inside the Ingredient List
The Flavor Base
Golden brown sugar is the heart of this recipe. Its caramelized flavor adds depth and a subtle molasses undertone that balances the sweetness of the frosting. If you can’t find it, substitute with light brown sugar and add a pinch of molasses to mimic the complexity.
Salted butter brings a buttery richness that cuts through the sugar’s sweetness. The salt enhances the overall flavor profile, making every bite more satisfying. For a dairy‑free version, use a high‑quality vegan butter that’s been salted for an extra punch.
The Texture Crew
All‑purpose flour provides the structure that holds the brownies together. Sifting it with cocoa powder ensures an even distribution of flavor and prevents lumps. If you prefer a gluten‑free version, switch to a gluten‑free blend that has a similar protein content.
Cocoa powder is the secret weapon that gives the brownies their deep chocolate flavor. Use a high‑quality, unsweetened cocoa to avoid the bitterness that can come from lower‑grade varieties. Adding a dash of espresso powder can intensify the chocolate note without altering the overall taste.
The Unexpected Star
Red food coloring isn’t just for aesthetics; it subtly enhances the cocoa’s depth by masking some of the bitterness, creating a smoother flavor. Use a natural beetroot or paprika‑based coloring for a healthier option that still delivers a vibrant hue.
The egg binds everything together, providing structure and a tender crumb. If you’re looking for a vegan alternative, try a flax egg (1 tbsp ground flaxseed mixed with 3 tbsp water) or a commercial egg replacer that’s designed for baking.
The Final Flourish
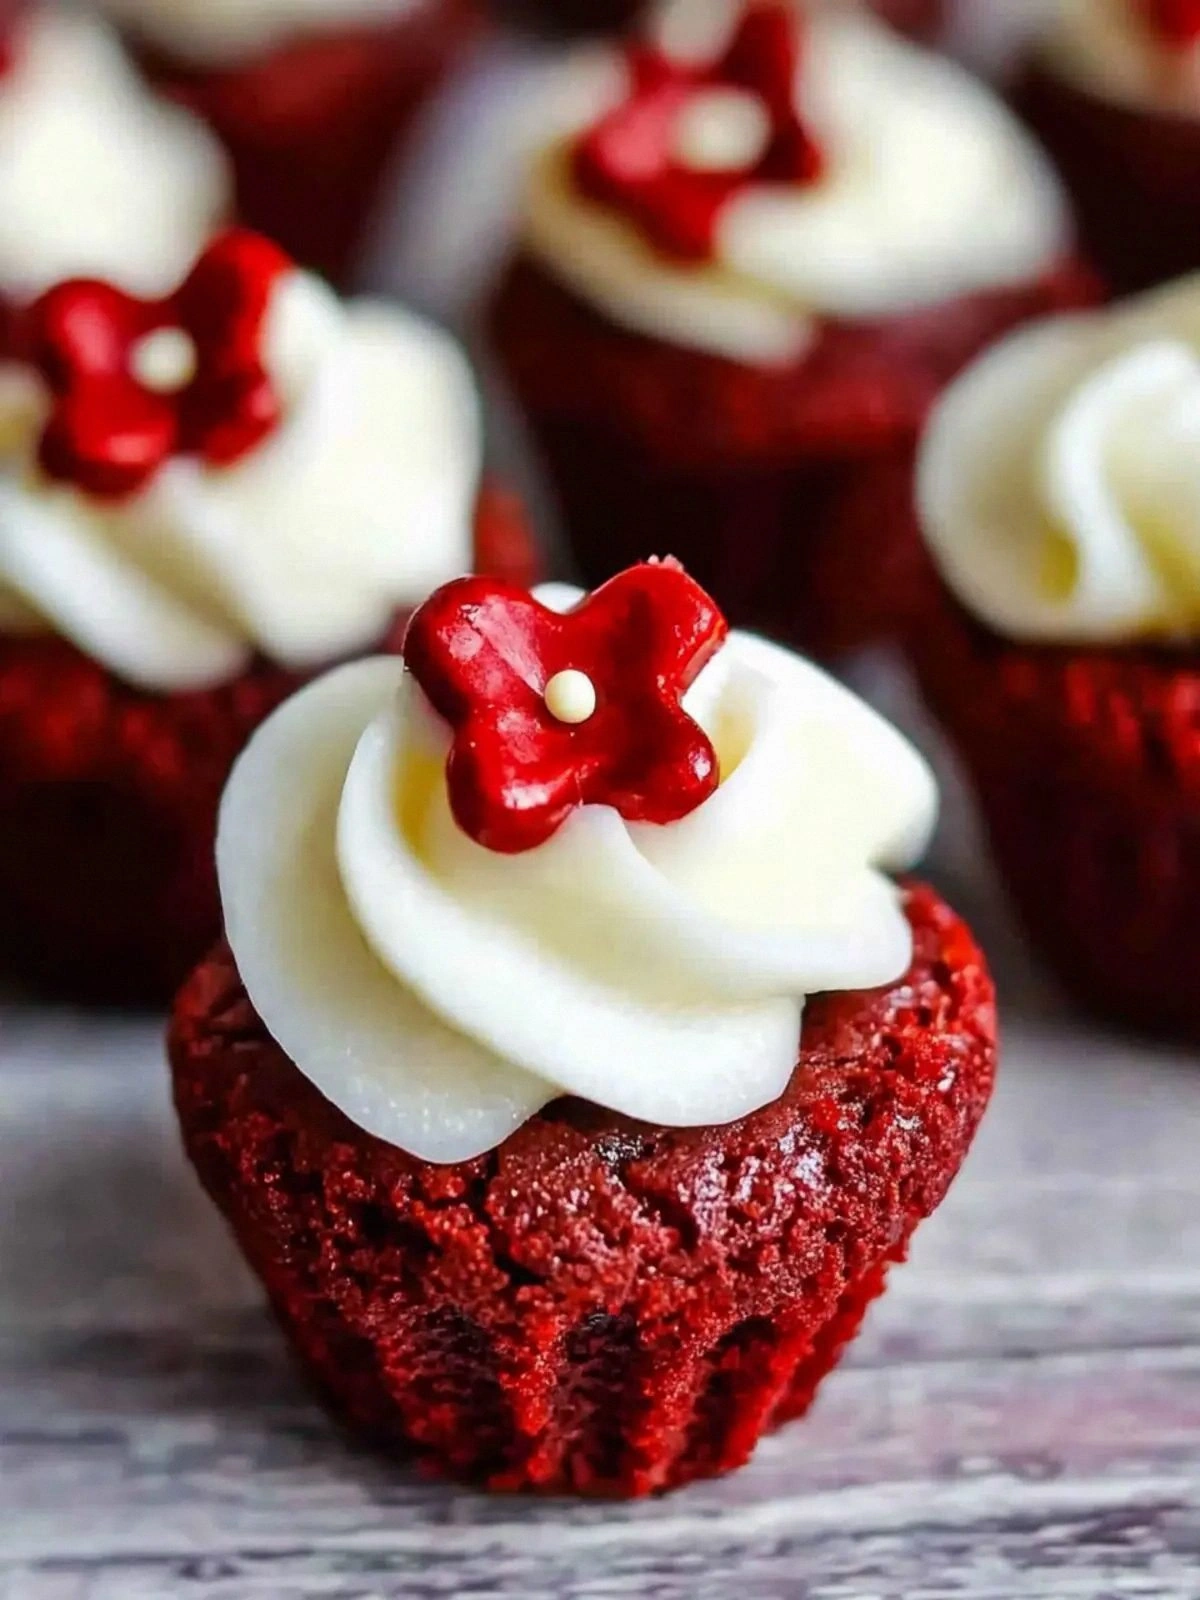
Cream cheese frosting adds a tangy, creamy layer that balances the sweetness of the brownies. Use a high‑fat cream cheese for a richer texture, and consider adding a splash of espresso or a pinch of sea salt for an extra dimension.
Wilton Gingerbread Boy sprinkles are the finishing touch, providing a playful crunch and a nostalgic holiday vibe. If you’re not in the holiday mood, try chocolate or rainbow sprinkles for a more contemporary look.
Everything’s prepped? Good. Let’s get into the real action.
The Method — Step by Step
- Preheat your oven to 350°F (175°C). Line a 9x9 inch pan with parchment paper, ensuring it hangs over the sides for easy removal. In a medium bowl, combine ½ cup salted butter and 1 cup golden brown sugar. Melt the mixture over low heat, stirring until silky smooth and the sugar has dissolved. This step ensures a consistent base that won’t separate during baking.
- Add 2 teaspoons vanilla extract, ½ teaspoon salt, 1 large egg, and 4 teaspoons red food coloring to the melted butter mixture. Whisk vigorously until the mixture is glossy and the egg is fully incorporated. The red food coloring will give the batter a striking hue that’s as visually stunning as it is flavorful. This is the moment when the batter feels like a velvety liquid that’s ready to be transformed.
- In a separate bowl, sift together 1 cup all‑purpose flour and 2 tablespoons cocoa powder. Gently fold the dry ingredients into the wet mixture until just combined—over‑mixing will make the brownies tough. The cocoa powder’s bitterness is balanced by the sugar, creating a complex chocolate flavor. If you prefer a lighter crumb, you can replace half the flour with cake flour.
- Pour the batter into the prepared pan, using a spatula to spread it evenly. The batter should form a smooth, glossy surface that’s slightly darker than the surrounding pan. This ensures an even bake and a uniform crumb throughout the brownie. If you notice any air bubbles, tap the pan gently on the counter to release them.
- Bake for 25–30 minutes, or until a toothpick inserted near the edge comes out with a few moist crumbs. The edges should pull away from the pan slightly, indicating a perfectly baked brownie. Watch the color carefully—if it starts to brown too quickly, tent the pan with foil. The aroma during this stage is intoxicating, promising a rich, chocolatey treat.
- Let the brownies cool in the pan on a wire rack for 20 minutes. The cooling time allows the structure to set, making them easier to slice. While they’re cooling, prepare the frosting by beating 12 oz cream cheese, ½ cup softened butter, 1 cup powdered sugar, and 1 teaspoon vanilla extract until light and fluffy. The frosting should be smooth, not grainy, for that perfect finish.
- Spread the frosting evenly over the cooled brownies using a spatula. The frosting should cover the entire surface, creating a smooth, glossy layer that’s a delight to look at. This step also adds a tangy counterpoint to the rich chocolate base. For an extra touch, lightly dust the frosting with a pinch of sea salt.
- Sprinkle 2 tablespoons of Wilton Gingerbread Boy sprinkles over the frosting, pressing them lightly into the surface. The sprinkles add a playful crunch and a festive holiday vibe, even if you’re not celebrating Christmas. Slice the brownies into 12 equal squares with a hot, wet knife for clean cuts. Serve immediately or store in an airtight container at room temperature for up to a week.
That's it — you did it. But hold on, I've got a few more tricks that'll take this to another level.
Insider Tricks for Flawless Results
The Temperature Rule Nobody Follows
Many bakers bake brownies at a higher temperature to get a quick crust, but that often leads to a dry interior. Baking at 350°F (175°C) gives the brownies time to set while maintaining moisture. I’ve tried 375°F and the texture was noticeably firmer, lacking that buttery softness. Keep the oven at 350°F and you’ll achieve a perfect balance.
Why Your Nose Knows Best
The scent of baking brownies is a reliable indicator of doneness. When the aroma becomes rich and chocolatey, it means the sugars have caramelized just right. If the smell is too sweet, the brownies are overbaked; if it’s still raw, they need more time. Trust your nose as a professional guide.
The 5-Minute Rest That Changes Everything
After removing the brownies from the oven, let them rest in the pan for 5 minutes before transferring them to a wire rack. This rest period allows the brownies to set, making them easier to cut and preventing them from crumbling. Skipping this step often results in jagged edges and a crumbly texture.
The Right Pan Matters
A 9x9 inch non‑stick pan or a parchment‑lined pan ensures even heat distribution. If you use a heavy‑bottomed pan, the brownies may brown too quickly on the bottom. A light‑bottomed pan keeps the heat consistent, producing a uniform crumb and a golden crust.
The Perfect Frosting Ratio
Using a 12 oz cream cheese to ½ cup butter ratio creates a frosting that’s creamy yet firm enough to hold its shape. Too much butter can cause the frosting to slide off, while too little will make it crumbly. Adjusting the ratio slightly can cater to personal texture preferences.
The Secret Ingredient Swap
If you’re short on cream cheese, substitute it with mascarpone for a milder, sweeter frosting. The mascarpone’s lower fat content will result in a lighter frosting, but it still delivers a creamy finish. I tried it once for a brunch and it was a hit.
Creative Twists and Variations
This recipe is a playground. Here are some of my favorite ways to switch things up:
Chocolate Ganache Drizzle
Replace the cream cheese frosting with a glossy chocolate ganache made from dark chocolate and heavy cream. Drizzle it over the cooled brownies for a decadent, glossy finish. The ganache adds a silky texture that pairs beautifully with the brownie’s moist crumb.
Nutty Crunch
Fold ½ cup chopped pecans or walnuts into the batter before baking. The nuts add a satisfying crunch and a nutty aroma that complements the chocolate. Keep an eye on the baking time; the nuts can brown quickly.
Espresso Infusion
Add 1 teaspoon of instant espresso powder to the dry mix to deepen the chocolate flavor. Espresso also helps balance the sweetness, giving the brownies a more robust taste. This version is perfect for coffee lovers.
Salted Caramel Swirl
Swirl a layer of salted caramel sauce into the batter before baking. The caramel adds a sweet‑salty contrast that elevates the overall flavor. Use a thick, buttery caramel to avoid a runny center.
Berry Burst
Fold ½ cup of fresh blueberries or raspberries into the batter after mixing the wet ingredients. The berries burst in the oven, creating pockets of juicy flavor that contrast with the dense brownie. This variation is a great way to add a fresh, fruity note.
Vegan Version
Swap the butter for melted coconut oil, use a flax egg (1 tbsp ground flaxseed mixed with 3 tbsp water), and replace the cream cheese frosting with a vegan alternative. The texture will be slightly different but still delicious. The vegan frosting can be made with coconut cream and powdered sugar.
Storing and Bringing It Back to Life
Fridge Storage
Store the brownies in an airtight container at room temperature for up to 4 days. If you need to keep them longer, place them in the refrigerator, and they’ll last up to a week. The frosting may firm up slightly, but a quick warm‑up will restore its creaminess.
Freezer Friendly
For freezer storage, wrap each brownie individually in plastic wrap, then place them in a freezer bag. They’ll stay fresh for up to 3 months. Thaw at room temperature for 30 minutes before serving. The frosting may become slightly softer, so gently re‑apply a thin layer of frosting if desired.
Best Reheating Method
To bring the brownies back to life, warm them in a preheated 300°F (150°C) oven for 5 minutes. For the frosting, add a splash of water or milk to the bowl, then whisk until smooth. This steamy technique restores moisture and prevents the brownies from becoming dry.