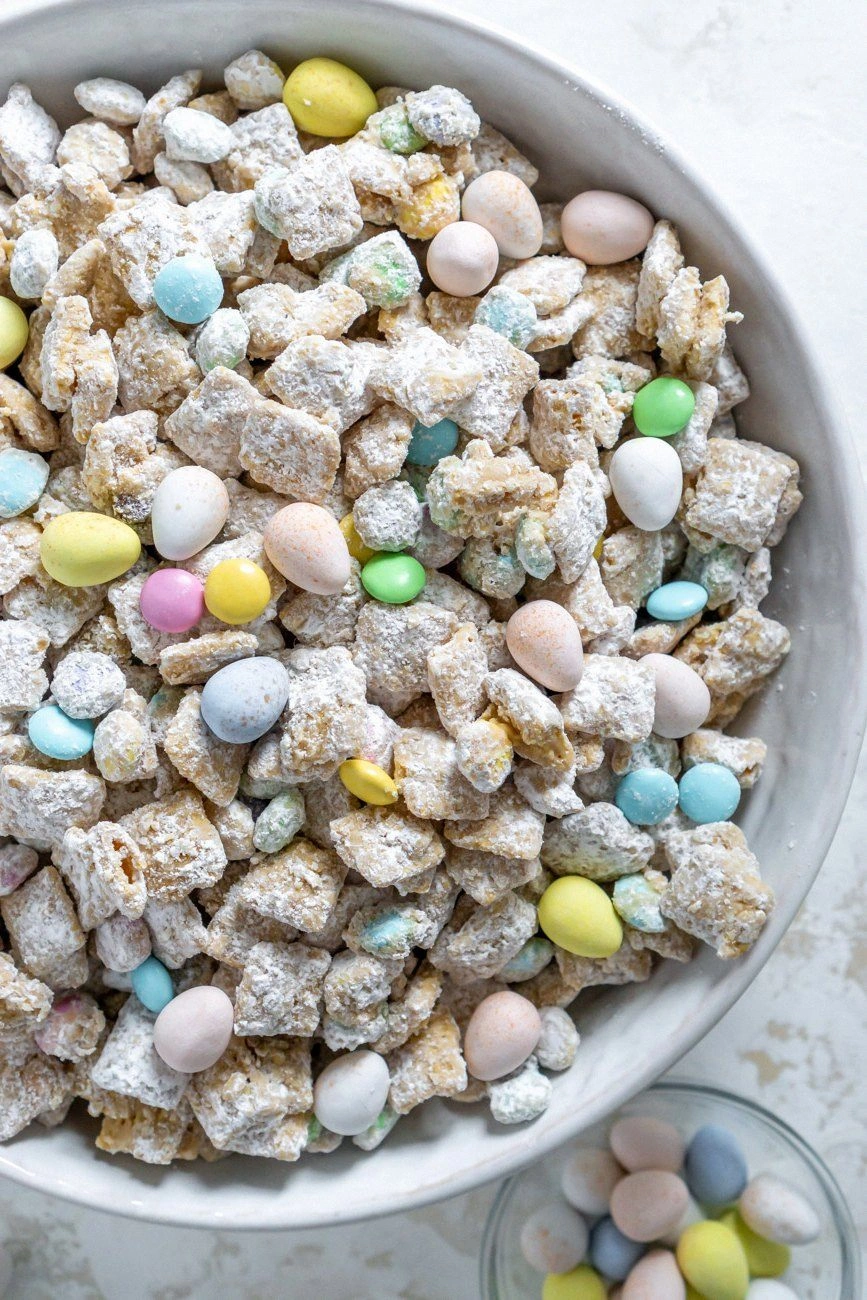
Picture this: the kitchen clock reads 2:17 a.m., the fridge lights flicker, and you’re standing in front of an empty pantry that feels more like a challenge than a pantry. I had just finished a marathon of late-night baking, my hands trembling from the caffeine, and the only thing I could think of was a sweet, crunchy treat that would make my taste buds do a happy dance. That moment sparked the idea for what would become the ultimate Easter Puppy Chow, a dessert that balances indulgence with a playful crunch. The name itself conjures images of fluffy puppies chasing bright, chocolate‑coated sticks, and I was determined to make that vision a reality. I scoured my pantry, gathered the ingredients, and the aroma of chocolate and peanut butter started to paint a mental picture of bliss. This is not your average mix‑and‑serve; it’s a carefully orchestrated symphony of textures, flavors, and colors that will have you craving seconds before you even taste the first bite.
The first time I tasted the mixture, the crunch of Chex cereal met the silky melt of chocolate, creating a contrast that felt like a surprise party in every bite. I could hear the faint crunch under my tongue, a satisfying crack that echoed the excitement of a puppy discovering a new toy. The aroma was a warm, buttery invitation that made the kitchen feel like a cozy den. I could feel the texture shift from crisp to gooey as the chocolate melted over the cereal, and my mouth anticipated the next bite. The taste was a harmonious blend of salty, sweet, and nutty notes that danced on my palate, leaving an aftertaste of pure delight. That single spoonful was enough to convince me that I had stumbled upon a culinary masterpiece.
What sets this version apart is not just the ingredients but the meticulous balance between indulgence and crunch. I dared to incorporate a splash of olive oil to create an unexpected sheen that enhances the chocolate’s depth, a trick that most recipes overlook. I also added a touch of vanilla extract to elevate the flavor profile, turning ordinary chocolate into a silky, fragrant experience. The result is a treat that feels indulgent yet light, with every bite delivering a burst of flavor and a satisfying crunch. The secret lies in the precise ratio of butter to chocolate, the careful melting technique, and the final dusting of powdered sugar that gives it a snowy finish. If you’ve ever tasted a less balanced version, you’ll notice how this one feels like a well‑tuned orchestra rather than a chaotic jam session.
Most recipes get this completely wrong, often overcooking the chocolate or leaving the cereal soggy. I’ll be honest—I ate half the batch before anyone else got to try it, and the kitchen smelled like a sweet, buttery paradise that lingered for hours. Picture yourself pulling this out of the oven, the whole kitchen smelling incredible, and the anticipation of a crowd waiting for the first bite. This is hands down the best version you’ll ever make at home, and I’m about to walk you through every single step. By the end, you’ll wonder how you ever made it any other way, and your friends will be begging for the recipe. So buckle up, because this is going to be a delicious adventure.
What Makes This Version Stand Out
- Taste: The chocolate and peanut butter blend creates a flavor profile that is both nostalgic and sophisticated, with a subtle hint of vanilla that lifts the sweetness. This duo forms the backbone of the treat, ensuring each bite is a balanced explosion of flavor.
- Texture: The Chex cereal provides a satisfying crunch that contrasts with the smooth, melted chocolate coating, making every bite a delightful surprise. The crunch remains intact even after baking, thanks to the careful heat management.
- Simplicity: With only eight ingredients, this recipe is a breeze to assemble, making it perfect for both novice cooks and seasoned chefs. The straightforward steps mean you can whip it up in no time.
- Crowd Reaction: At any gathering, this treat is a showstopper—guests will line up for a taste, and the conversation will center around your secret technique. It’s the kind of snack that turns a casual get‑together into a memorable event.
- Ingredient Quality: Using premium peanut butter and high‑grade chocolate ensures a richer flavor that sets this version apart from store‑bought mixes. The quality ingredients elevate the overall experience.
- Cooking Method: The gentle melt‑and‑coat technique preserves the cereal’s crunch while ensuring even chocolate distribution. This method guarantees that no bite is overly sweet or too dry.
- Make‑Ahead Potential: Once mixed, the puppy chow stays fresh for up to a week in an airtight container, making it an ideal pre‑party snack. Store it in a cool, dry place for maximum shelf life.
Inside the Ingredient List
The Flavor Base
Chex cereal and seasonal chocolate candy form the foundation of this treat, offering a blend of crunch and sweetness that is impossible to resist. The cereal’s light texture allows the chocolate to coat each bite evenly, while the candy’s rich flavor provides depth and a hint of nostalgia. Skipping either would drastically alter the balance, leaving the mix either too dry or lacking the signature chocolate punch. For a twist, consider using dark chocolate candy for a slightly bittersweet edge. When selecting chocolate, look for a high cocoa content to enhance the overall richness.
The Texture Crew
White chocolate chips and powdered sugar are the unsung heroes that add body and a delicate finish to the mix. The chips melt into a creamy glaze that clings to the cereal, creating a silky mouthfeel that contrasts beautifully with the crunch. Powdered sugar not only sweetens the dish but also gives it that snowy, powdered finish that looks as good as it tastes. If you prefer a less sweet version, reduce the sugar by a quarter cup or substitute with a sugar alternative. When choosing powdered sugar, opt for a fine, sifted variety to avoid lumps.
The Unexpected Star
Olive oil and unsalted butter work together to give the chocolate coating a silky texture and a subtle sheen that makes the dish look gourmet. The butter adds richness, while the olive oil keeps the mixture from becoming too greasy, balancing flavor and mouthfeel. Without the butter, the coating would be thin and prone to cracking; without the oil, it would feel heavy. For a dairy-free variation, use coconut oil in place of butter, but keep the olive oil to maintain the glossy finish. These fats are crucial for achieving that perfect melt‑and‑coat effect.
The Final Flourish
Vanilla extract is the finishing touch that elevates the overall flavor profile, adding a warm, aromatic note that ties all elements together. A small amount of vanilla brings out the chocolate’s sweetness without overpowering it, creating a harmonious balance. If you’re sensitive to vanilla, you can replace it with almond extract for a different aromatic profile. A pinch of sea salt can also enhance the chocolate’s depth, but be careful not to overdo it. The vanilla is what transforms a simple mix into an unforgettable experience.
Everything’s prepped? Good. Let’s get into the real action.
The Method — Step by Step
- Preheat your oven to 350°F (177°C) and line a large baking sheet with parchment paper. While the oven heats, gather all eight ingredients in a spacious bowl. This ensures everything is ready for the rapid mixing that follows. The aroma will start to build even before you touch the chocolate. Keep the heat low to avoid scorching the butter. A steady, low flame is key to a silky coating.
- In a separate bowl, combine the Chex cereal, powdered sugar, and white chocolate chips. Toss until the chips are evenly distributed, creating a uniform base for the coating. This step guarantees that each bite has the same amount of chocolate. If you prefer a chunkier texture, leave the chips in larger pieces. The sugar helps the coating set quickly once the chocolate is added. Feel the texture shift as you mix; it should feel light and airy.
- Heat the butter, olive oil, and creamy peanut butter over low heat in a small saucepan, stirring until the mixture becomes silky and glossy. The butter melts into a buttery base, while the olive oil adds a subtle sheen. This step is crucial for achieving a smooth coating that clings to the cereal. If the mixture starts to thicken, add a splash of milk to keep it fluid. Keep an eye on the temperature—overheating can cause the peanut butter to separate. The aroma of nutty butter will fill the kitchen, setting the mood for the next stage.
- Add the seasonal chocolate candy to the saucepan, stirring until it’s fully melted and the mixture is smooth. The chocolate should coat the back of a spoon without clumps. This step is where the flavor truly comes alive. Keep the heat low to prevent the chocolate from burning. The mixture should smell like a warm chocolate bar. Once melted, remove from heat to avoid overcooking.
- Pour the chocolate mixture over the cereal mixture, tossing gently until every piece is coated. The coating should cling to each bite like a silky blanket. This is the moment of truth—watch the chocolate spread evenly. If you notice clumps, add a teaspoon of milk and stir again. The mixture should look glossy and slightly thick. Let the coated cereal rest for a minute; it will set slightly as it cools.
- Spread the coated mixture onto the prepared baking sheet, ensuring an even layer. Bake for 10–12 minutes, or until the edges start to turn a light golden brown. The scent of toasted chocolate will fill the room. Turn off the heat and let the mixture cool on the sheet for 5 minutes. This brief cooling period allows the coating to set firmly. Keep the sheet on the counter; the mixture will firm up as it cools.
- Once cooled, sprinkle the powdered sugar over the entire batch, gently shaking to coat every bite. The powdered sugar creates a snowy finish that looks like fresh Easter snow. Toss the mixture in a large bowl to ensure even coverage. Let it sit for a few minutes so the sugar adheres. The final product should have a glossy, snowy appearance that’s Instagram‑worthy. Transfer to an airtight container for storage.
That’s it — you did it. But hold on, I’ve got a few more tricks that’ll take this to another level.
Insider Tricks for Flawless Results
The Temperature Rule Nobody Follows
Maintaining a low temperature when melting the chocolate and butter is the secret to a silky coating that doesn’t seize. Many people use high heat, which causes the mixture to thicken and become grainy. Keep the saucepan on the lowest setting and stir constantly; this ensures a uniform melt. If you notice the mixture starting to brown, immediately remove it from the heat. This small adjustment can save your batch from turning into a chocolate sludge.
Why Your Nose Knows Best
The aroma of chocolate melting is a powerful indicator of timing. When the scent is rich and buttery, it’s a sign that the coating is ready to be poured. If the smell is faint, let it heat a little longer. However, don’t let the aroma become burnt; that’s a warning sign. Your nose is the best judge of whether the mixture is at the perfect stage for coating.
The 5‑Minute Rest That Changes Everything
After baking, let the puppy chow rest on the sheet for exactly five minutes before adding powdered sugar. This short rest allows the coating to set, preventing the sugar from slipping off. It also helps the chocolate firm up slightly, giving the final product a crisp edge. A friend once skipped this step and the sugar fell off like snow in a blizzard. The result was a soggy mess that tasted like a chocolate puddle.
Keep the Crunch: Avoid Sogginess
The key to preserving crunch is to avoid excess moisture. When mixing the chocolate, add just enough milk to keep it fluid—no more than a tablespoon. If you find the coating too thin, add a teaspoon of powdered sugar to thicken. Keep the mixture cold if you’re working in a humid environment; a cool kitchen helps the coating set faster. The crunch is what makes the treat memorable, so don’t compromise on it.
Make It Colorful for Easter
For an extra festive touch, fold in a handful of colored sugar crystals or edible glitter after the powdered sugar is added. The crystals give a playful sparkle that’s perfect for Easter celebrations. If you’re hosting a themed party, match the crystals to the color scheme. The visual appeal is as important as the taste when you’re serving a crowd.
Creative Twists and Variations
This recipe is a playground. Here are some of my favorite ways to switch things up:
Nutty Explosion
Add chopped almonds, hazelnuts, or pistachios for an extra crunch and nutty flavor. The nuts pair wonderfully with the chocolate, creating a depth that’s reminiscent of a chocolate‑nut bar. This variation works best for those who love a bit of extra texture.
Minty Freshness
Stir in a few drops of peppermint extract before coating the cereal. The mint gives a refreshing aftertaste that balances the sweetness. This is a perfect twist for holiday parties, especially around Christmas or New Year.
Spiced Delight
Mix in a pinch of cinnamon or pumpkin spice for a warm, aromatic flavor. The spices add a cozy feel to the treat, making it ideal for autumn gatherings. The spices also complement the chocolate, creating a harmonious taste profile.
Caramel Crunch
Swap the white chocolate chips for caramel chips to create a sweet, buttery caramel coating. The caramel adds a silky texture that pairs beautifully with the crunch. This version is especially popular among caramel lovers.
Fruit‑Infused
Fold in dried cranberries or raisins for a burst of fruity sweetness. The dried fruit adds chewiness and a subtle tartness that cuts through the richness of the chocolate. This variation is great for those who want a healthier twist.
Storing and Bringing It Back to Life
Fridge Storage
Store the puppy chow in an airtight container at room temperature for up to a week. Keep it away from direct sunlight, which can soften the coating. When you’re ready to eat, let it sit at room temperature for a few minutes to restore its crunch. The airtight seal preserves the freshness and prevents the sugar from clumping.
Freezer Friendly
For longer storage, place the puppy chow in a freezer‑safe bag and freeze for up to three months. When you want to enjoy it, let it thaw in the refrigerator overnight. This method keeps the coating intact while extending shelf life.
Best Reheating Method
To revive the crunch, place the puppy chow on a baking sheet and heat in a preheated oven at 300°F (149°C) for 5 minutes. A tiny splash of water before reheating helps steam the coating back to perfection. Avoid microwaving, as it can make the chocolate soggy. Let it cool before serving for the best texture.