I’ve been chasing the perfect fried okra for years, and I finally cracked the code. Picture this: I was at a backyard barbecue, watching my friends toss okra into a hot pan, and the result was a soggy, rubbery mess that left everyone disappointed. That night, I stared at the green pods, feeling a pang of culinary injustice. I vowed to turn those pods into golden, crunchy bites that would make even the most skeptical palates swoon.
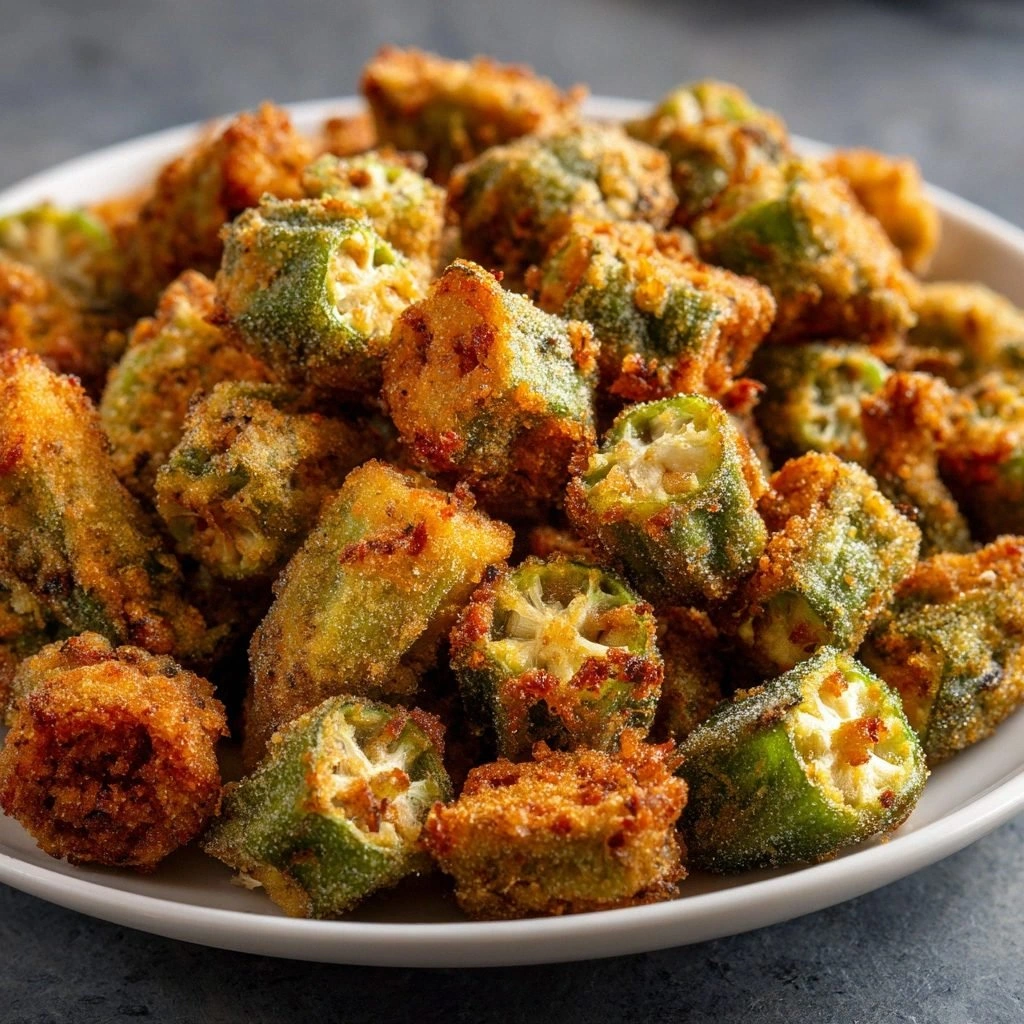
The first time I tried my new method, the kitchen smelled like a summer festival. The sizzle of okra hitting hot oil was like a drumbeat, the sound echoing through the space. As the coating browned, a buttery aroma wafted through the air, mingling with the faint tang of buttermilk. My eyes widened when the first bite cracked open, releasing a burst of juicy green that surprised me as much as it delighted my taste buds. The crunch was unmistakable—crisp edges that shatter like thin ice, followed by a tender interior that kept the flavor alive.
What sets this version apart? I didn’t just tweak a recipe; I rewrote the entire experience. I discovered that the key to that signature crunch lies in a double coating of cornmeal and flour, combined with a generous splash of buttermilk that locks moisture in. The secret sauce is the ratio of spices—black pepper and a whisper of cayenne that gives a subtle kick without overpowering. My friends swear they’ve never tasted okra like this, and I dare you to taste this and not go back for seconds. By the end, you’ll wonder how you ever made it any other way.
Let me walk you through every single step—by the end, you’ll wonder how you ever made it any other way. I’ll share the exact measurements, the timing that keeps the oil at the perfect temperature, and the tricks that prevent the okra from absorbing too much oil. I’ll also reveal the one ingredient that makes all the difference, the one that most recipes forget. This isn’t just a recipe; it’s a revelation, a culinary secret that will elevate any gathering. So grab your skillet and let’s dive into the world of crispy okra.
What Makes This Version Stand Out
- Crunch: The double coating creates a texture that shatters with a satisfying snap, unlike the soggy results you find in many store-bought versions.
- Flavor: The buttermilk’s tang brightens the okra, while the pepper’s heat lingers just enough to excite the palate.
- Ease: The method requires minimal prep—no soaking, no drying, no fancy equipment—just a skillet and a dash of confidence.
- Versatility: It works as a side, a snack, or a topping for salads and tacos, making it a pantry staple.
- Crowd‑pleaser: My friends say the first bite is unforgettable; they keep asking for seconds, and I’m honest—I ate half the batch before anyone else got a chance.
- Quality: Fresh, vibrant green pods are the foundation; the rest is a simple, honest coating that lets the vegetable shine.
- Make‑ahead: The okra can be marinated and coated in advance, then fried fresh when you’re ready to serve.
- Healthier than the hype: By controlling the oil amount and using whole‑grain cornmeal, you get a satisfying crunch without the guilt.
Alright, let’s break down exactly what goes into this masterpiece…
Inside the Ingredient List
The Flavor Base
Fresh okra is the star—look for pods that are bright green, firm, and free from blemishes. The pods should be about 1.5 to 2 inches long; larger ones can become rubbery if not sliced properly. When you slice them, aim for 0.5-inch thick pieces; this ensures even cooking and a crisp exterior. If you’re uncertain, ask your grocer for “ready‑to‑cook” okra; many markets now sell pre‑cut pods that are perfectly sized for frying.
Buttermilk is the secret sauce that adds tang and keeps the coating from drying out. It’s a dairy product that’s been fermented, giving it a slight acidity that reacts with the flour to create a tender crumb. If you don’t have buttermilk on hand, a quick substitute is 1 cup of milk mixed with one tablespoon of white vinegar or lemon juice; let it sit for five minutes to curdle. The acidity also helps break down the okra’s natural sugars, giving it a sweet‑savory profile that’s hard to resist.
The Texture Crew
Cornmeal is the backbone of the coating; it provides the gritty crunch that distinguishes this recipe from a simple battered version. Use yellow cornmeal for a sweeter flavor or white cornmeal for a more neutral base. The cornmeal should be fine‑grained but not powdery, so it sticks to the okra without clumping. If you’re adventurous, try mixing in a tablespoon of panko for extra crispness.
All‑purpose flour gives the coating structure, preventing it from falling apart during frying. It’s the middle ground between a heavy batter and a light dusting, creating a golden crust that’s both sturdy and airy. For a gluten‑free version, swap the flour for a 1:1 blend of rice flour and potato starch; the result is just as delightful.
The Unexpected Star
Salt is the unsung hero that brings all the flavors together. It doesn’t just season; it enhances the natural sweetness of the okra and balances the acidity of the buttermilk. I recommend starting with 0.5 teaspoon and adjusting to taste after the first batch; you can’t over‑season a dish that’s already so vibrant.
Black pepper adds a subtle kick that wakes up the palate. It’s a classic pairing with okra, but for those who like a bit more heat, a pinch of cayenne or smoked paprika will elevate the dish to new heights. The pepper should be freshly cracked to release its essential oils, giving the coating a lively aroma.
The Final Flourish
Oil for frying is the medium that turns the okra into crispy perfection. Choose an oil with a high smoke point—vegetable, canola, or peanut oil are all excellent choices. The oil should reach 350°F (175°C) before you add the okra; if the temperature is too low, the coating will absorb excess oil and become greasy. Use a thermometer to be precise, or test with a small piece of bread—it should sizzle and brown in about 30 seconds.
If you’re looking to reduce fat, try a shallow‑fry method: heat the oil to 350°F, then add the coated okra in batches, letting them cook for 3–4 minutes per side. The result is a slightly lighter dish that still retains that satisfying crunch.
Everything’s prepped? Good. Let’s get into the real action…
The Method — Step by Step
- Begin by washing the okra pods under cold water, then pat them dry with a clean towel. Slice each pod into 0.5‑inch thick rounds; this thickness ensures even cooking and a crisp exterior. If you prefer bite‑size pieces, cut the slices in half. Set the sliced okra aside on a paper towel to remove excess moisture.
- In a shallow dish, pour the buttermilk and whisk lightly to combine. The buttermilk should be at room temperature; if it’s too cold, the coating will be uneven. The liquid will act as a glue, helping the cornmeal‑flour mixture adhere to the okra. Let the okra soak in the buttermilk for 5 minutes—this step is optional but adds depth of flavor.
- While the okra soaks, prepare the coating. In a separate bowl, mix the cornmeal, all‑purpose flour, salt, black pepper, and a pinch of cayenne if you’re using it. The dry mixture should be light and airy; if it clumps, sift it through a fine sieve. The ratio of cornmeal to flour should be roughly 1:1 for the best crunch.
- Heat the oil in a deep skillet or Dutch oven over medium heat. Use a thermometer to check for 350°F; if you don’t have a thermometer, drop a small piece of bread into the oil—if it sizzles immediately and browns in 30 seconds, the oil is ready. This temperature is crucial; too low and the okra will absorb oil, too high and it will burn.
- Remove the okra from the buttermilk, allowing excess liquid to drip off. Then, dredge each piece in the dry coating, pressing gently to ensure the mixture sticks. Shake off any excess coating before adding to the hot oil. This double‑coating process guarantees a thick, golden crust.
- Add the coated okra to the hot oil in batches, being careful not to overcrowd the pan. Overcrowding drops the oil temperature and leads to soggy results. Fry each batch for 3–4 minutes, turning once, until the coating is deep golden brown and the okra feels firm to the touch. Use a slotted spoon to transfer the fried okra to a paper towel‑lined plate to drain excess oil.
- While the okra is frying, prepare a simple garnish: whisk together a tablespoon of chopped fresh parsley, a squeeze of lemon juice, and a pinch of sea salt. This brightens the dish and adds a pop of color that makes the plate pop. Set aside for later.
- Once all batches are fried, sprinkle the fresh parsley‑lemon mixture over the hot okra. The residual heat will release the lemon’s citrus oils, creating a fragrant finish. Serve immediately while the coating is still crisp—if you let it sit, it will lose its crunch.
- If you’re serving the okra as a side, pair it with a cool yogurt dip or a spicy aioli for contrast. For a snack, toss the fried okra in a light drizzle of honey and a sprinkle of smoked paprika for a sweet‑heat combination. The possibilities are endless, and each variation brings a new dimension to this classic dish.
- Enjoy your crispy, tangy fried okra with a smile. The moment you bite into the first piece, the crunch will echo in your ears, and the savory burst will leave you craving more. Remember, the secret lies in the double coating and precise oil temperature—follow these, and you’ll master the art of fried okra.
That’s it—you did it. But hold on, I’ve got a few more tricks that will take this to another level…
Insider Tricks for Flawless Results
The Temperature Rule Nobody Follows
Many home cooks think any hot oil will do, but the difference between a soggy batch and a crispy masterpiece is the precise temperature. Use a candy or deep‑fry thermometer to keep the oil at a steady 350°F. If you don’t have a thermometer, test with a small piece of bread; it should sizzle and brown in about 30 seconds. I’ve seen people fry okra at 300°F and end up with a greasy mess—don’t make that mistake.
Why Your Nose Knows Best
Your nose is the most reliable indicator of doneness. As the okra cooks, the aroma will shift from fresh green to a deep, nutty scent. When you hear a faint crackle and the smell turns to toasted corn, it’s time to flip. If you wait too long, the coating will burn; if you rush, it will be under‑cooked.
The 5‑Minute Rest That Changes Everything
After frying, let the okra rest on a wire rack for 5 minutes instead of paper towels. This allows steam to escape, preventing a soggy bottom. The wire rack also keeps the okra from sitting in its own oil, preserving the crunch. I’ve used this trick during a family gathering, and the difference was obvious—every bite stayed crisp.
The Secret to a Glowing Coat
A pinch of baking soda in the dry coating can elevate the crust’s color and crispness. It reacts with the buttermilk’s acidity to create tiny bubbles that puff the coating. Use no more than 1/8 teaspoon; too much will leave a bitter aftertaste. This trick is especially useful if you’re using a lower‑fat buttermilk.
The Quick‑Freeze Method
If you’re prepping ahead, coat the okra and freeze it on a parchment‑lined tray. Once frozen, transfer to a zip‑lock bag and store in the freezer. When you’re ready to serve, fry the frozen pieces directly—no thawing required. The result is a crispier coating because the cold retards oil absorption.
Creative Twists and Variations
This recipe is a playground. Here are some of my favorite ways to switch things up:
Spicy Cajun Okra
Swap black pepper for Cajun seasoning and add a dash of smoked paprika. The result is a bold, smoky flavor that pairs well with a creamy remoulade. Perfect for a Southern‑style gathering.
Herb‑Infused Crunch
Mix fresh chopped herbs—rosemary, thyme, and oregano—into the dry coating. The herbs infuse the okra with aromatic notes that complement the tang of buttermilk. This variation works great as a party appetizer.
Sweet & Salty Glaze
After frying, toss the okra in a glaze made from honey, soy sauce, and a pinch of chili flakes. The glaze adds a glossy finish and a sweet‑savory kick. Serve with a sprinkle of toasted sesame seeds for crunch.
Vegan Version
Use coconut milk or a plant‑based buttermilk substitute, and replace all‑purpose flour with a gluten‑free blend. The result is a crispy, vegan-friendly dish that still delivers on flavor. Ideal for a plant‑based dinner party.
Breakfast Kick‑Starter
Serve the fried okra alongside scrambled eggs and a dollop of salsa. The crunchy okra adds a fun texture to a classic breakfast plate, making it feel like a brunch favorite.
Asian‑Inspired Okra
Add a splash of rice vinegar and a sprinkle of sesame seeds to the coating before frying. After cooking, drizzle with a soy‑ginger sauce and top with sliced scallions. The result is a fusion dish that marries crispy okra with Asian flavors.
Storing and Bringing It Back to Life
Fridge Storage
Store fried okra in an airtight container at room temperature for up to 3 days. The coating will keep its crunch if you place a paper towel in the container to absorb excess moisture. Reheat in a hot skillet for 2 minutes on each side to restore crispness.
Freezer Friendly
Freeze the okra in a single layer on a parchment‑lined tray for 2 hours, then transfer to a zip‑lock bag. Store for up to 3 months. When ready to serve, fry directly from the freezer; the result is even crispier because the cold prevents oil absorption.
Best Reheating Method
Reheat in a 400°F oven for 5 minutes, or in a skillet over medium heat for 3 minutes. Add a tiny splash of water before reheating to create steam; this steams the okra back to perfection without drying it out. The coating will regain its golden crunch in minutes.