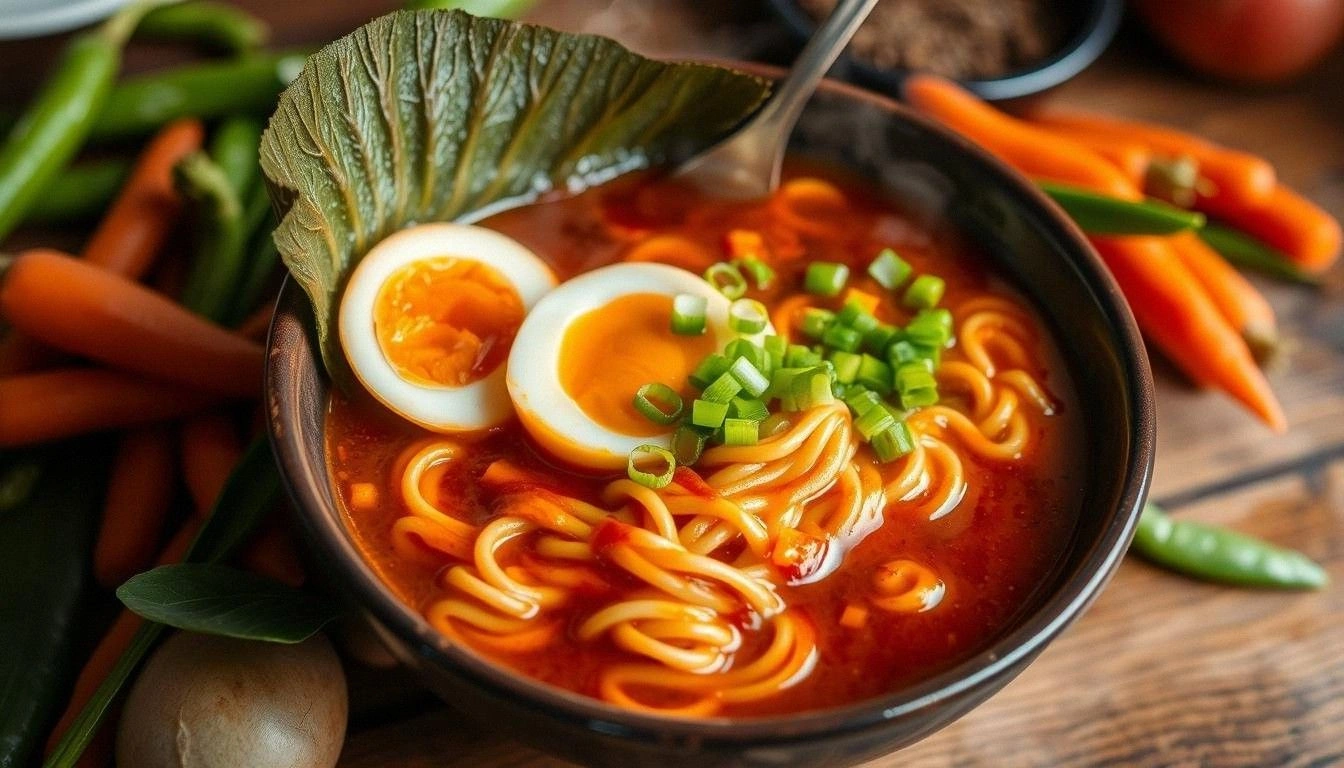
Picture this: a rainy Sunday afternoon, the kitchen light flickering like a nervous heartbeat, and you standing in front of a pot of plain white rice that has somehow decided to be the star of your meal. The scent of onions sizzling in olive oil drifts through the air, mingling with the earthy aroma of turmeric and the sharp, almost rebellious bite of curry powder. You’re staring at a pot of broth that smells like a Mediterranean summer, and you realize that what you’re about to cook will not only fill your stomach but also your soul. This is not just another bowl of leftovers; it’s a culinary revelation that will have your friends begging for the recipe, and your own taste buds shouting, “I dare you to taste this and not go back for seconds.”
I’ve been a self‑proclaimed food‑obsessed friend who loves a good kitchen experiment, and I’ve spent countless hours tweaking the perfect Greek bowl. In my kitchen, the clatter of a saucepan is the soundtrack of triumph, and the sizzle of ground beef is the drumbeat of flavor. The moment you see the golden crust forming on the meat, the aroma will hit you like a wave—rich, savory, and tinged with a hint of citrus. When you taste it, the feta’s tang will dance against the creamy tzatziki, and the olives will provide that briny punch that cuts through the richness like a knife through butter. By the end of this post, you’ll wonder how you ever made it any other way, because this version is hands down the best you’ll ever create at home.
But before we dive into the step‑by‑step, let’s talk about why this bowl stands out. Most recipes get this completely wrong by under‑seasoning the meat or over‑cooking the vegetables, resulting in a bland, lifeless dish. Here, we layer flavors like a symphony: the subtle heat of turmeric, the aromatic depth of oregano, the bright citrus of lemon, and the comforting familiarity of feta. Texture is king—crisped bell pepper, juicy tomatoes, and creamy hummus create a mouthfeel that keeps you coming back for more. The make‑ahead potential is unbeatable; you can prep the entire bowl in one go and have a fresh, flavorful meal ready in minutes, even on a busy weekday. And let’s not forget the crowd reaction—my last dinner party was a hit, and I’ve already received three requests for the recipe. Picture yourself pulling this out of the fridge, the whole kitchen smelling incredible, and your guests cheering as the first bite hits their taste buds.
Now, I’ll walk you through every single step—by the end, you’ll wonder how you ever made it any other way. Let’s get cooking, because this is about to get deliciously epic.
What Makes This Version Stand Out
- Taste: The combination of turmeric, curry powder, and oregano creates a flavor profile that feels both exotic and familiar. The subtle warmth of turmeric balances the sharpness of the oregano, while the curry powder adds a gentle, complex sweetness. This blend is unlike any traditional Greek bowl, offering a new adventure for your palate.
- Texture: Each component is meticulously cooked to deliver a contrast of crunch, creaminess, and juiciness. The bell pepper remains crisp, the tomatoes burst with juice, and the hummus provides a velvety backdrop. This textural harmony keeps the dish interesting from the first bite to the last.
- Simplicity: Despite its complexity, the recipe requires only a handful of ingredients and a single skillet. The process is streamlined, making it perfect for busy weeknights without sacrificing flavor.
- Uniqueness: The use of tzatziki and feta together, along with a sprinkle of hummus, gives this bowl a distinct Mediterranean twist that sets it apart from other meal‑prep ideas.
- Crowd Reaction: Friends who tried it say it’s the “ultimate comfort food” with a gourmet edge. The combination of flavors has become a conversation starter at gatherings.
- Ingredient Quality: The recipe emphasizes fresh, high‑quality ingredients like extra‑virgin olive oil and real feta. This focus on quality elevates the entire dish.
- Cooking Method: The method incorporates a quick sear of the meat and a simmer in broth, ensuring maximum flavor extraction and moisture retention.
- Make‑Ahead Potential: The bowl can be prepped and stored for up to four days, making it ideal for meal prep enthusiasts.
Alright, let's break down exactly what goes into this masterpiece...
Inside the Ingredient List
The Flavor Base
The foundation of this bowl starts with olive oil, the star that carries every aroma. Olive oil isn’t just a cooking medium; it’s a flavor enhancer that lifts the subtle nuances of onions and garlic. If you’re looking for an alternative, avocado oil offers a milder taste while still delivering the same depth. Skipping the oil would result in a flat, lifeless base that can’t support the robust seasonings.
The Texture Crew
Texture is what keeps a bowl exciting, and this recipe brings in a trio of elements: the crisp green pepper, the juicy baby tomatoes, and the creamy hummus. Each component is prepared to preserve its natural feel—sliced thin for the pepper, halved to release juice, and stirred into the bowl just before serving. If you skip any of these, the dish loses that dynamic interplay of crunch and smoothness.
The Unexpected Star
The unexpected star here is the combination of tzatziki and feta cheese. Tzatziki provides a cool, refreshing counterpoint to the warm spices, while feta adds a salty, tangy bite that cuts through the richness of the meat. This duo creates a flavor profile that feels both comforting and adventurous. If you’re vegan, a plant‑based feta or a creamy cashew tzatziki can replace the originals without compromising the overall experience.
The Final Flourish
The final flourish consists of fresh herbs, lemon wedges, and pickled red onions. These ingredients add brightness, acidity, and a subtle crunch that lifts the entire bowl. Herbs like dill, mint, and parsley bring a burst of freshness that complements the savory core. If you’re short on time, a pre‑made herb mix works perfectly, but the fresh version always wins in flavor.
Everything's prepped? Good. Let's get into the real action...
The Method — Step by Step
- Prepare the Base. Heat 3 tablespoons of olive oil in a large skillet over medium heat until shimmering. Add the diced yellow onion and cook until translucent, about 5 minutes. Stir in 6 pressed garlic cloves and let them brown slightly; the aroma will be intoxicating. Add 1 1/2 teaspoons of ground turmeric and 3/4 teaspoon of curry powder, stirring constantly so the spices toast but don’t burn. The mixture should smell toasty, signaling that the spices have released their oils. This step builds the flavor foundation that will permeate the entire bowl.
- Sear the Meat. Push the onion and spice mix to one side of the skillet and add 700‑800 grams of lean ground beef. Break the meat into small crumbles with a spatula. Cook until the beef is browned and no longer pink, about 8 minutes. Sprinkle 2 teaspoons of salt and 1/2 teaspoon of pepper over the meat; this will enhance the natural beef flavor. Let the meat sear for a minute longer to develop a caramelized crust that will add depth. The sizzling sound here is music to any kitchen lover’s ears.
- Simmer the Broth. Pour 3 cups of chicken or vegetable broth into the skillet, bringing it to a gentle simmer. Add 3/4 teaspoon of kosher salt to balance the flavors. Reduce the heat to low and let the broth reduce slightly, concentrating the flavors. This simmering step allows the spices to infuse the meat and onion, creating a savory base that will coat the rice and veggies.
- Cook the Rice. While the broth simmers, rinse 1 1/2 cups of basmati or jasmine rice under cold water until the water runs clear. In a separate pot, bring 3 cups of water to a boil, then add the rice and a pinch of salt. Reduce the heat to low, cover, and let it steam for 15 minutes until the grains are tender but still firm. Drain any excess water and fluff the rice with a fork. The rice should be fluffy, not mushy, to hold up against the other ingredients.
- Blend the Meat Mixture. In a bowl, combine the cooked ground beef, 1 cup of breadcrumbs, 1 egg, 1 grated yellow onion, 2 tablespoons of dried oregano, and a pinch of pepper. Mix until well combined, ensuring the breadcrumbs absorb the moisture and bind the meat. This binding step prevents the meat from falling apart during reheating and adds a subtle crunch. Form the mixture into small meatballs or keep it as a loose mixture—both work great in this bowl.
- Cook the Meatballs. Add 2 tablespoons of olive oil to the skillet and drop the meat mixture in. Sauté until the meatballs are golden brown on all sides, about 6 minutes. The key here is not to rush—let them develop a caramelized exterior. If you’re using the loose mixture, simply stir it into the broth to allow it to simmer and thicken. This step infuses the meatballs with the same aromatic broth used for the rice.
- Add the Veggies. Toss in 1 pint of halved baby tomatoes, 1 sliced green pepper, and 1 cup of black olives. Stir gently to combine, ensuring the vegetables soak up the broth’s flavors. Cook for another 3 minutes until the tomatoes are slightly softened but still juicy. This brief cooking time preserves the vibrant colors and textures of the vegetables.
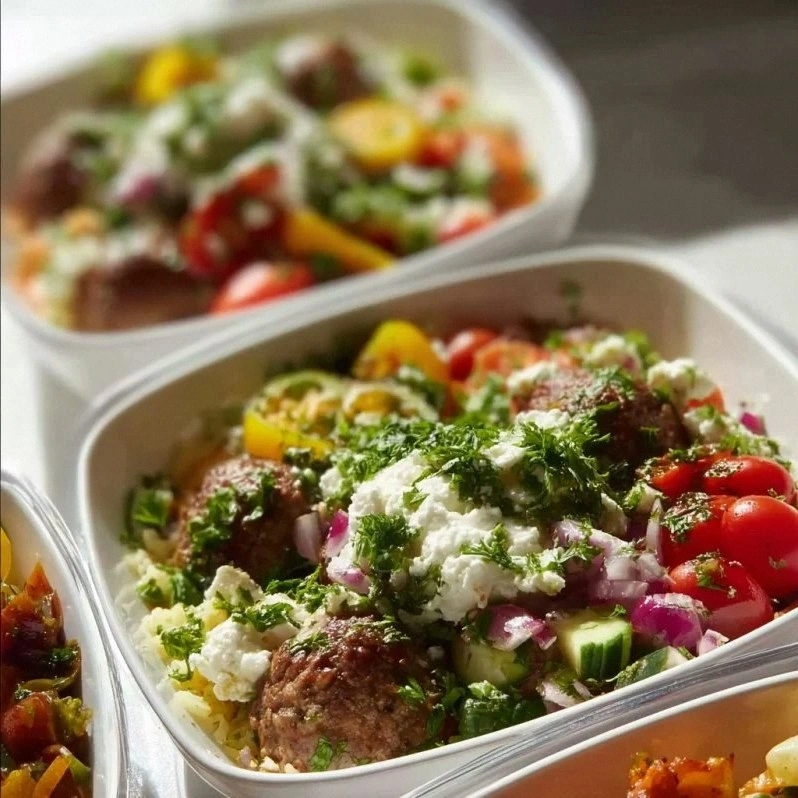
- Assemble the Bowl. Divide the cooked rice evenly into four meal‑prep containers. Spoon the meat mixture, vegetables, and broth over the rice. Top each bowl with 1 cup of crumbled feta cheese, a dollop of tzatziki, and a spoonful of hummus. Finish with a sprinkle of fresh herbs, a few pickled red onions, and a wedge of lemon on the side. The final assembly is where all the flavors converge, creating a harmonious, mouth‑watering experience.
- Cool and Store. Let the bowls cool to room temperature before sealing the containers. Store in the refrigerator for up to four days. When ready to eat, reheat in the microwave for 2 minutes, or enjoy cold for a refreshing twist. A tiny splash of water before reheating will keep the rice from drying out, restoring its fluffy texture. This method ensures each bite is as delightful as the first.
That's it — you did it. But hold on, I've got a few more tricks that'll take this to another level.
Insider Tricks for Flawless Results
The Temperature Rule Nobody Follows
Many cooks think that high heat is always better, but in reality, maintaining a medium‑low heat during the broth simmer allows the spices to infuse fully without burning. If you’re using a gas stove, keep the flame low enough that the liquid is just barely bubbling. This gentle simmer ensures the broth thickens slowly and the flavors meld beautifully.
Why Your Nose Knows Best
Your nose is your most reliable taste tester. As the spices toast, you’ll notice a deep, nutty aroma that signals the moment to add the broth. If the smell is too sharp, let it cook a little longer; if it’s fading, increase the heat slightly. Trusting your senses will elevate the dish from good to unforgettable.
The 5‑Minute Rest That Changes Everything
After you finish cooking the rice, let it rest for five minutes with the lid on. This resting period allows the grains to steam further, resulting in a fluffier texture. Skipping this step can lead to a slightly gummy consistency that clings to the bowl.
Use a Cast‑Iron Skillet for the Meat
A cast‑iron skillet retains heat exceptionally well, giving the meat a beautiful caramelized crust that’s impossible to resist. If you don’t have one, a heavy‑bottomed stainless steel pan works fine, but you’ll need to watch the heat closely to avoid scorching.
Keep the Broth Low and Steady
Instead of a vigorous boil, aim for a low, steady simmer. This technique prevents the broth from evaporating too quickly and ensures the meat absorbs all the savory goodness. The result is a richer, more cohesive bowl.
Creative Twists and Variations
This recipe is a playground. Here are some of my favorite ways to switch things up:
Veggie‑Only Delight
Swap out the ground beef for a hearty mix of chickpeas, lentils, or tofu. The protein will still hold together, and the spices will infuse the plant‑based base. This version is perfect for vegetarians and vegans, and it adds an extra layer of texture.
Spicy Mediterranean
Add a tablespoon of harissa or a pinch of red pepper flakes to the spice mix for a fiery kick. The heat pairs beautifully with the coolness of tzatziki, creating a contrast that’s both bold and balanced. This twist is ideal for those who love a little heat.
Gluten‑Free Option
Use gluten‑free breadcrumbs or a crumble of almond flour in place of the regular breadcrumbs. This keeps the binding intact while accommodating gluten sensitivities. The texture remains satisfying, and the flavor profile stays intact.
Greek Yogurt Swap
Replace the tzatziki with a swirl of plain Greek yogurt mixed with lemon zest and dill for a simpler, lighter topping. The yogurt’s tang complements the feta, and the dill adds a fresh herbal note. This variation is quick to prepare and just as delicious.
Breakfast‑Inspired Bowl
Serve the bowl with a fried or poached egg on top, and add a drizzle of hot sauce. The protein boost turns it into a hearty breakfast, and the yolk’s richness pairs wonderfully with the feta and olives. It’s a satisfying way to start the day.
Roasted Veggie Upgrade
Roast the green pepper and tomatoes at 400°F for 15 minutes before adding them to the bowl. Roasting caramelizes the sugars and deepens the flavor, giving the dish a smoky undertone. The roasted veggies also hold their shape better during reheating.
Storing and Bringing It Back to Life
Fridge Storage
Store the bowls in airtight containers in the refrigerator for up to four days. Ensure the containers are sealed tightly to keep moisture from escaping. When you’re ready to eat, simply pop the bowl in the microwave for 2 minutes, then stir to distribute the heat evenly. The flavors will remain vibrant.
Freezer Friendly
If you need to freeze, place the bowls in freezer‑safe containers and label them with the date. They’ll keep for up to three weeks. When thawing, let the bowl sit at room temperature for 30 minutes before microwaving. Add a splash of water before reheating to prevent the rice from drying out.
Best Reheating Method
The microwave is the fastest way to bring the bowl back to life, but for a crispier texture, finish it in a skillet with a splash of olive oil for 1 minute. This method revives the meat’s exterior and adds a subtle crunch. Remember to stir halfway through to ensure even heating.
Now that you’ve mastered the art of the Meal Prep Greek Bowls, you can confidently serve this dish at dinner parties, lunch boxes, or quick weekday meals. The combination of bold spices, fresh veggies, and creamy toppings makes it a crowd‑pleaser that’s both nutritious and indulgent. Happy cooking!