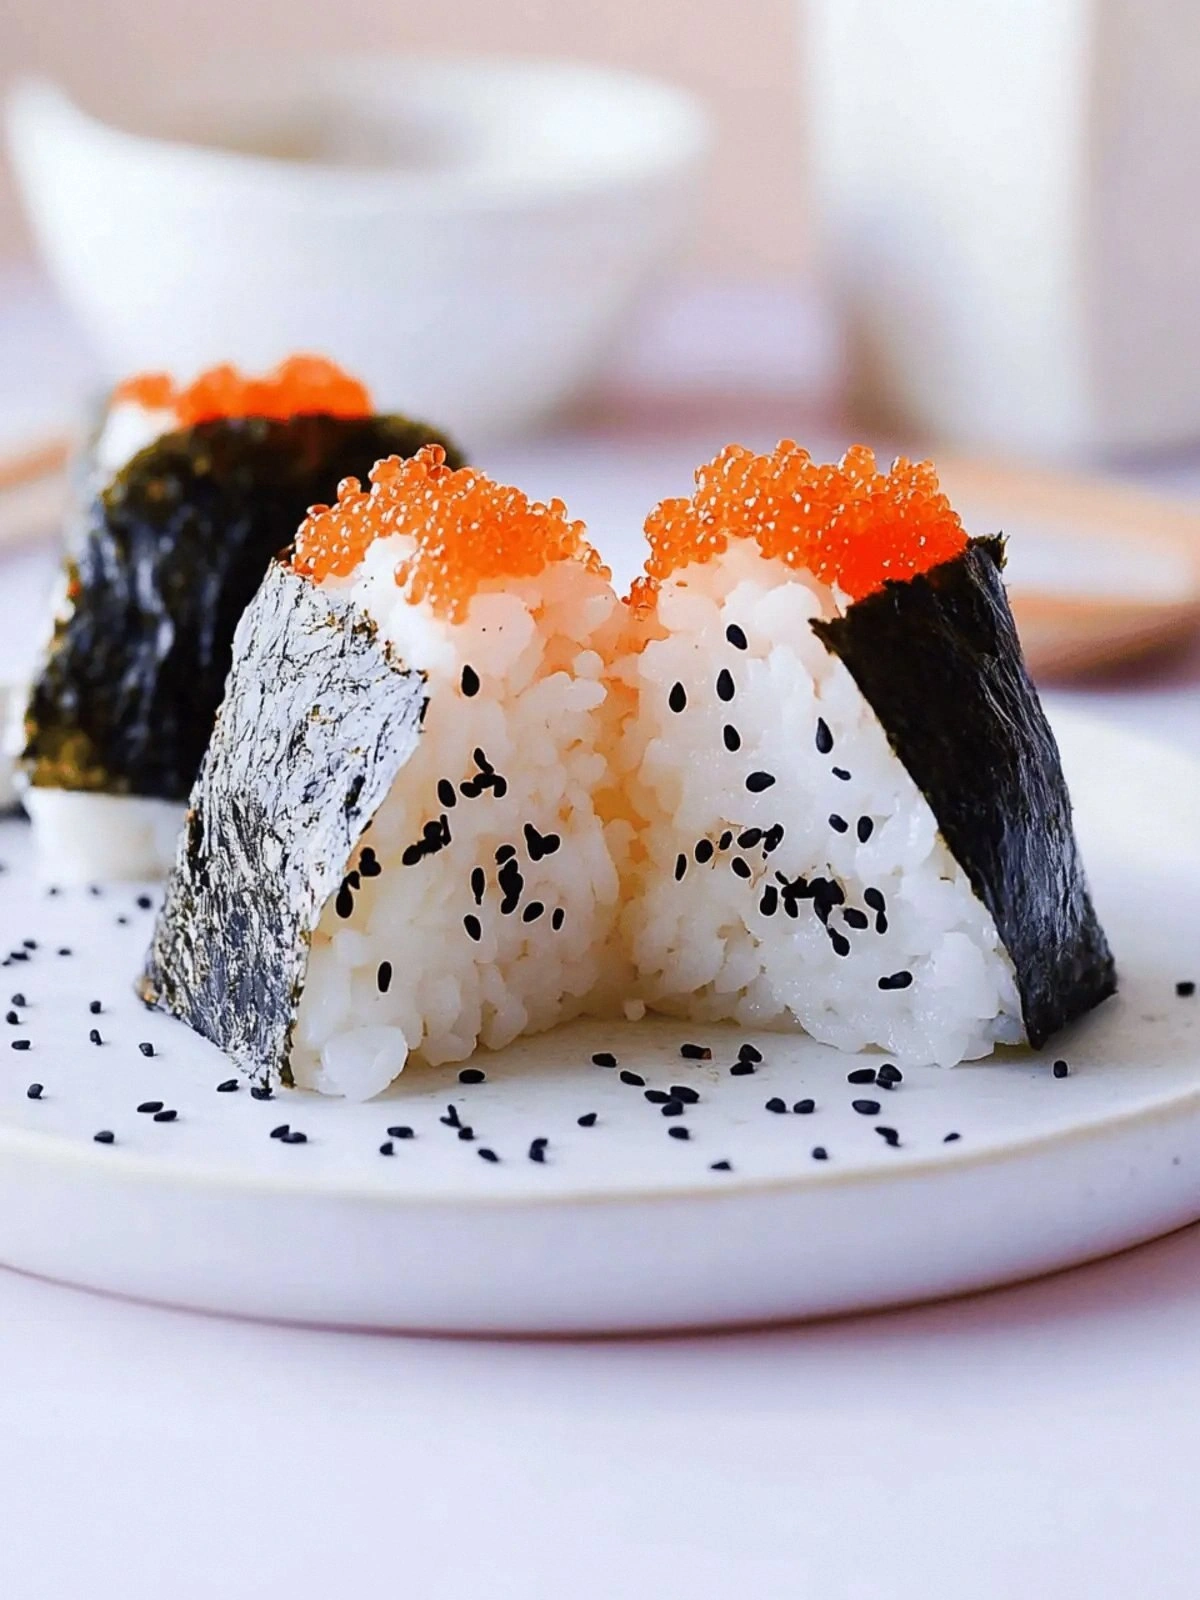
Savory Salmon Onigiri: Perfect
Picture this: you’re halfway through a Sunday brunch, the kitchen smells like fresh coffee and toasted bread, and you’re staring at a bag of leftover salmon that’s been chilling in the fridge since last night’s dinner. You’re tempted to toss it into the trash, but then you remember the old family recipe your grandmother used to make, a humble Japanese rice ball that turned simple leftovers into a gourmet treat. That moment of culinary hesitation turned into a revelation, and now I’m here to spill the secrets that turned an ordinary salmon packet into the most addictive onigiri you’ve ever tasted.
I was in a bit of a kitchen crisis that afternoon—my oven was on fire (yes, I still have the scorch marks on my countertop), my rice was slightly undercooked, and the salmon was a sad, dry slab that had lost all its flavor. I thought about ordering takeout, but then I remembered that the only thing left in my fridge was that salmon, a handful of rice, and a bag of nori. I decided to throw everything together, and the result was a smoky, buttery, spicy rice ball that made me laugh so hard I cried. That laugh was the first indicator that something truly special had happened.
Now, let me tell you why this version is a game-changer. First, it uses the exact amount of salmon you have on hand, so no waste. Second, the sauce is a silky blend of mayo, sriracha, and sesame oil that coats the rice like velvet, giving you a burst of umami with every bite. Third, the nori adds a subtle crunch that contrasts with the chewy rice, creating a textural harmony that most onigiri recipes miss. Fourth, the addition of furikake gives a salty, umami finish that elevates the dish to a whole new level.
And here’s the kicker: this recipe turns your leftover salmon into a dish that feels fresh, almost like it’s been freshly cooked. I dare you to taste this and not go back for seconds. I’ll be honest—when I first made this, I ate half the batch before anyone else even got a taste. If you’ve ever struggled with making onigiri that sticks together, you’re not alone. I’ve got the fix, and I’m about to walk you through every single step—by the end, you’ll wonder how you ever made it any other way.
What Makes This Version Stand Out
- Taste: The combination of creamy mayo and fiery sriracha creates a flavor profile that is both comforting and adventurous, unlike the bland plain rice you might find in other recipes.
- Texture: The rice is seasoned just right so it clings together without becoming mushy, while the salmon provides a slight chew that keeps the bite interesting.
- Simplicity: Every ingredient is something you probably already have in your pantry or fridge—no need to hunt for exotic spices.
- Uniqueness: The use of Kewpie mayo, which has a richer, slightly sweeter profile than regular mayo, gives a depth that standard recipes lack.
- Crowd Reaction: Friends who’ve tried this say it’s “the best onigiri they’ve ever had” and keep asking for the recipe.
- Ingredient Quality: Using leftover salmon keeps the dish fresh, and the nori adds a subtle umami crunch that’s hard to replicate with dried seaweed.
- Cooking Method: The quick sear of the rice in sesame oil locks in flavor without overcooking, a trick many onigiri recipes overlook.
- Make‑ahead Potential: The onigiri can be assembled the night before and refrigerated, making it a perfect grab‑and‑go snack for busy mornings.
Inside the Ingredient List
The Flavor Base
The rice vinegar and mirin are the backbone of the onigiri’s seasoning. The vinegar cuts through the richness of the salmon, while the mirin adds a subtle sweetness that balances the heat from the sriracha. If you omit either, the dish loses its bright, clean finish, and the salmon becomes overpowering. You can use a splash of sake if you prefer a more nuanced umami, but keep the ratio at 1:1 to maintain the flavor balance.
The Texture Crew
The leftover cooked rice should be slightly sticky but not clumpy. If your rice is too dry, add a tablespoon of water and fluff it gently before mixing. The salmon’s texture is key; it should be flaked into small pieces that hold together without becoming mushy. A quick pan sear adds a hint of caramelization, giving the salmon a buttery finish that contrasts beautifully with the rice.
The Unexpected Star
Kewpie mayo is the star that turns this onigiri from simple to sensational. Its Japanese-style seasoning gives a sweeter, richer flavor than standard mayo, and it mixes seamlessly with the sriracha to create a silky sauce. If you can’t find Kewpie, a good substitute is a mixture of regular mayo with a dash of rice vinegar and a pinch of sugar. The mayo’s thickness also helps bind the rice, preventing it from falling apart.
The Final Flourish
The nori sheets add a subtle umami crunch that contrasts with the soft rice. They also serve as a convenient wrapper, making the onigiri easy to eat on the go. If you’re a fan of extra crunch, sprinkle a little toasted sesame seed on top before serving. The furikake, which is a Japanese seasoning blend, adds a final burst of savory flavor that completes the dish. Don’t be afraid to experiment with different furikake flavors—seaweed, sesame, or even a spicy variant can change the profile entirely.
Everything's prepped? Good. Let’s get into the real action.
The Method — Step by Step
- Prepare the Rice: Place the cooked rice in a large bowl and drizzle the rice vinegar and mirin over it. Toss gently with a wooden spoon until the rice is evenly coated. The rice should have a subtle shine and a faint tang that hints at the sweet and sour balance. This step is crucial; skipping it will result in bland, lifeless rice.
- Season the Salmon: In a small bowl, combine the leftover salmon, Kewpie mayo, sriracha, and sesame oil. Mix until the salmon is fully coated and the sauce is glossy. The mixture should feel slightly thick but still pourable. The sriracha adds a kick, while the sesame oil gives a nutty aroma that lingers in the air.
- Blend the Mixture: Pour the salmon mixture into the seasoned rice. Fold gently until the salmon is evenly distributed throughout the rice. Be careful not to overmix; the rice should remain fluffy and not turn into a paste.
- Shape the Onigiri: Wet your hands with a little water to prevent sticking. Take a handful of the rice mixture and form it into a triangular shape, about the size of a small fist. Press firmly but gently to ensure the rice holds together without cracking. The shape is traditional and helps with easy handling.
- Wrap with Nori: Take a sheet of nori and cut it into strips that match the length of your onigiri. Wrap the nori around the rice ball, starting at the base and spiraling up. The nori should be snug but not too tight; you want to see a hint of rice at the top.
- Season with Furikake: Sprinkle furikake liberally over the top of the wrapped onigiri. The furikake will add a savory crunch and a burst of umami that complements the salmon. If you’re feeling adventurous, add a pinch of chili flakes for extra heat.
- Optional – Quick Pan Sear: If you want an extra layer of flavor, heat a non-stick skillet over medium heat and lightly brush it with sesame oil. Place the onigiri in the skillet, seam side down, and sear for 1-2 minutes until a golden crust forms. Flip gently and sear the other side for another minute. This step adds a caramelized aroma that will make your kitchen smell like a Japanese bistro.
- Cool and Store: Let the onigiri cool to room temperature before placing them in an airtight container. Store in the fridge for up to 24 hours, or freeze for up to 3 days. If you’re freezing, wrap each onigiri individually in parchment paper to prevent sticking.
- Reheat (Optional): To reheat, place the onigiri in a steamer basket over boiling water for 3-4 minutes. The steam will gently warm the rice without drying it out. If you prefer a crispier exterior, pop the onigiri in a preheated oven at 350°F for 5 minutes.
- Serve and Enjoy: Plate the onigiri with a side of pickled ginger or a small bowl of miso soup. The combination of textures and flavors will transport you straight to a bustling Tokyo street market. Remember to take a bite and let the flavors dance on your palate—this is where the magic happens.
That’s it—you did it. But hold on, I’ve got a few more tricks that will take this to another level.
Insider Tricks for Flawless Results
The Temperature Rule Nobody Follows
Most people cook onigiri at room temperature, but the secret to a perfect bite is to keep the rice just warm enough to stay pliable. If the rice is too hot, it will collapse; if it’s too cold, it will crumble. Aim for a temperature around 80°F (27°C). This small tweak ensures the onigiri holds its shape while still being tender.
Why Your Nose Knows Best
Smell is the ultimate judge of flavor. When you’re seasoning the rice, pause and inhale. A faint, sweet aroma from the mirin should mingle with the sharpness of the vinegar. If the smell is flat, add a splash of soy sauce to lift the umami.
The 5-Minute Rest That Changes Everything
After you’ve formed the onigiri, let it rest for 5 minutes before wrapping with nori. This brief pause allows the rice to settle, preventing the nori from tearing and giving the onigiri a tighter, more cohesive structure. Think of it as a quick “cool down” before the final assembly.
The Quick Seal
If you’re in a rush, press a small amount of furikake between the rice and the nori before sealing. This creates a thin, flavorful crust that adds an extra dimension of taste and texture. It’s a quick way to elevate a simple rice ball into a gourmet snack.
The Secret Ingredient Swap
For a smoky twist, add a teaspoon of smoked paprika to the rice mixture. The paprika will impart a subtle, earthy smokiness that complements the salmon’s natural flavor. A friend tried this once, and the result was a crowd-pleaser at a potluck—no one could stop asking for the recipe.
Creative Twists and Variations
This recipe is a playground. Here are some of my favorite ways to switch things up:
Teriyaki Salmon Onigiri
Replace the sriracha with teriyaki sauce and use a splash of soy sauce in the rice. The result is a sweet, savory onigiri that pairs well with a cucumber salad.
Spicy Tuna Roll‑Onigiri
Swap the salmon for canned tuna mixed with sriracha and mayonnaise. This variation is perfect for a quick lunch and gives a different protein profile.
Miso‑Glazed Salmon Onigiri
Marinate the salmon in miso, garlic, and a touch of honey before mixing it with the rice. The miso adds depth and a slightly fermented note that elevates the dish.
Avocado & Salmon Fusion
Dice avocado into the rice mixture for a creamy, buttery texture. The avocado balances the heat from the sriracha and gives a fresh, tropical feel.
Vegetarian Nori Balls
Omit the salmon entirely and add diced bell peppers, carrots, and edamame. Season with soy sauce, sesame oil, and a sprinkle of furikake for a colorful, plant‑based option.
Storing and Bringing It Back to Life
Fridge Storage
Place the onigiri in an airtight container and refrigerate for up to 24 hours. The rice will firm up, but the flavors will intensify. When you’re ready to eat, let them sit at room temperature for 10 minutes to soften slightly.
Freezer Friendly
Wrap each onigiri individually in parchment paper and place them in a freezer bag. Freeze for up to 3 days. When you’re ready to eat, thaw in the refrigerator overnight or use the microwave on a low setting for 30 seconds.
Best Reheating Method
To reheat, steam the onigiri for 3-4 minutes, or bake at 350°F for 5 minutes. Add a splash of water before reheating to create steam, which will keep the rice from drying out. The result is a warm, moist onigiri that tastes almost brand new.