It started with a kitchen catastrophe that would have sent me to the emergency room for a broken heart: I tried to bake a chocolate cake for a last‑minute dinner party and, in a rush, I mixed the batter with my fingers instead of a whisk. The result was a lumpy, soggy mess that looked like a chocolate swamp. My guests were skeptical, but I dared them to taste this and not go back for seconds. That moment of desperation turned into an obsession, and I set out to find the secret that would transform that flop into a show‑stopping dessert.
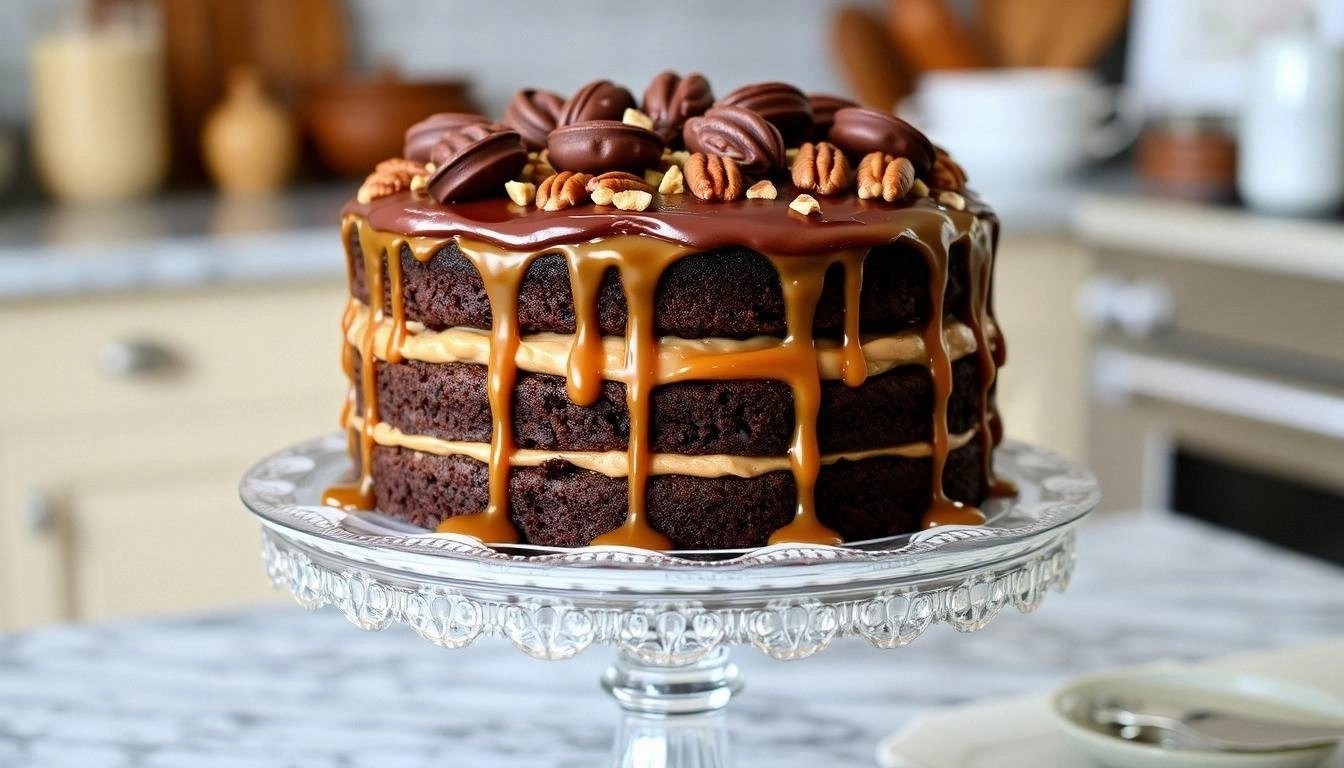
Picture the scene: the kitchen lights flicker, a timer buzzes, and the air is thick with the scent of cocoa and melted butter. The sound of the batter sloshing in the bowl feels like a promise, a symphony of sweet anticipation. When the first bite lands, the chocolate is velvety, the walnuts crunch like tiny glaciers, and the sea salt sparkles against the dark ganache. The texture is a harmonious blend of moist crumb and glossy glaze, each mouthful a revelation. You can almost taste the joy in every bite, the way the flavors dance across your tongue.
What makes this version stand out is that it doesn’t just replicate a classic recipe; it elevates it with layers of complexity that most kitchens overlook. I’ve tweaked the balance of wet and dry ingredients so that the cake stays tender without being dense. I’ve added toasted walnuts to introduce a subtle nutty crunch that pairs perfectly with the chocolate. A splash of heavy cream in the batter gives it an extra silky mouthfeel, while a dash of sea salt turns the ganache into a sophisticated masterpiece. The result? A cake that feels indulgent yet refined, and I dare you to say it’s anything less.
The secret weapon in this recipe is a technique that most bakers skip: tempering the chocolate chips before folding them into the batter. This simple step locks in the shine and prevents the chocolate from turning chalky. It also gives the cake a glossy finish that looks like it’s been hand‑painted by a pastry artist. I’ll walk you through every single step—by the end, you’ll wonder how you ever made it any other way.
I’ve spent countless evenings experimenting, and every tweak brought me closer to perfection. I’ve tested different types of chocolate, from bittersweet to milk, and found that the richer the cocoa, the deeper the flavor. I’ve played with walnut sizes, settling on medium‑sized pieces that bite without overpowering. I’ve even tried substituting almond flour for part of the all‑purpose flour to add a nutty undertone. Each iteration has taught me that the key to a great chocolate turtle cake is balance—sweetness, richness, and a hint of salt to bring everything together.
If you’ve ever struggled with a cake that turns out too dry or too heavy, you’re not alone—and I’ve got the fix. Most recipes get this completely wrong. Here’s what actually works: a precise ratio of wet to dry, the right mix of fats, and a little patience during the baking process. Picture yourself pulling this out of the oven, the whole kitchen smelling incredible, and the cake looking like a glossy, chocolatey jewel. And now, let’s break down exactly what goes into this masterpiece.
What Makes This Version Stand Out
- Taste: The combination of dark chocolate chips and toasted walnuts creates a flavor profile that is both sweet and savory, with a hint of sea salt that elevates every bite. The subtle bitterness of the cocoa balances the sweetness of the sugar, while the walnuts add a satisfying crunch. The result is a cake that feels indulgent but not overwhelming.
- Texture: The batter’s ratio of butter to flour gives the cake a tender crumb that melts in your mouth. Heavy cream adds a silky mouthfeel that keeps the cake moist even after baking. The glossy ganache glaze provides a smooth finish that contrasts beautifully with the cake’s airy interior.
- Simplicity: Despite its complex flavor, the recipe requires only basic kitchen tools—a mixing bowl, whisk, and oven. No fancy equipment or hard‑to‑find ingredients are needed, making it accessible for novice bakers. The steps are straightforward, with clear timing and temperature guidelines.
- Uniqueness: Tempering the chocolate before folding it into the batter is a technique that most bakers overlook, but it makes a huge difference in shine and texture. The addition of sea salt flakes on top creates a subtle contrast that enhances the chocolate’s richness. These small touches set this cake apart from the standard chocolate dessert.
- Crowd Reaction: Friends and family rave about the cake’s glossy finish and the crunchy walnuts. The cake’s appearance alone is enough to win over skeptics, and the flavor delivers on the promise. It’s a guaranteed hit for parties, holidays, or a quiet evening at home.
- Ingredient Quality: Using high‑quality dark chocolate and fresh walnuts makes all the difference. The cocoa powder should be unsweetened and finely ground to avoid grit. The butter should be room temperature, which helps create a smooth batter.
- Cooking Method: Baking at the right temperature (350°F/177°C) for the correct time (30 minutes) ensures a golden crust while keeping the interior moist. The cake should be removed from the oven when the edges pull away slightly, indicating a perfect bake.
- Make‑Ahead Potential: The cake can be assembled and refrigerated for up to 48 hours, allowing you to prep in advance for busy days. The ganache glaze can be stored in the refrigerator and re‑warm to restore its shine. This flexibility makes it a practical dessert for any schedule.
Inside the Ingredient List
The Flavor Base
All‑purpose flour is the backbone of this cake, providing structure while keeping the crumb tender. Use a fine‑sifted flour to avoid lumps and ensure a light texture. Skipping the flour will result in a cake that’s too dense and heavy.
Granulated sugar sweetens the batter and helps the cake brown beautifully. A higher sugar content creates a caramelized crust, but too much can make the cake overly sweet. If you’re watching calories, you can substitute half the sugar with a sugar alternative, but keep the ratio balanced.
Unsweetened cocoa powder adds depth and a rich chocolate flavor that’s essential for a true chocolate turtle cake. Use a high‑quality cocoa powder with a low ash content to avoid bitterness. If you prefer a milder chocolate taste, reduce the cocoa by a tablespoon.
Baking powder and baking soda work together to give the cake lift. Baking powder is acidic, while baking soda is alkaline; they react to produce carbon dioxide bubbles that keep the cake airy. Forgetting either will result in a flat, dense cake that doesn’t rise properly.
The Texture Crew
Unsalted butter at room temperature blends seamlessly with sugar, creating a creamy base that traps air. Butter adds flavor and keeps the cake moist. Using cold butter will prevent the batter from incorporating too much air, leading to a denser crumb.
Large eggs provide structure and moisture. The yolk adds richness while the white helps the batter rise. If you’re allergic to eggs, you can use a flaxseed or chia seed “egg” to mimic the binding properties.
Milk adds liquid to the batter, helping to dissolve the dry ingredients and create a smooth consistency. Whole milk gives the cake a richer taste, but you can use skim or almond milk for a lighter version. Be sure to add the milk gradually to avoid a lumpy batter.
Vanilla extract brings a subtle warmth that balances the chocolate. A dash of almond extract can be used as a variation for a different flavor profile. Too much vanilla will overpower the chocolate, so stick to the recommended amount.
The Unexpected Star
Dark chocolate chips are the heart of the cake, giving it a glossy, decadent finish. Tempering the chips before folding them into the batter locks in shine and prevents them from turning chalky. If you prefer a sweeter cake, you can replace half the dark chips with milk chocolate.
Toasted walnuts add a crunchy texture and a nutty flavor that complements the chocolate. Toasting the walnuts brings out their natural oils and prevents them from becoming stale. If you’re allergic to nuts, you can substitute with roasted pumpkin seeds for a crunchy alternative.
The Final Flourish
Sea salt flakes add a subtle contrast that enhances the chocolate’s richness. The salt brings out the sweetness and balances the bitterness of the cocoa. Use just a pinch; too much salt will overpower the delicate flavors.
Everything's prepped? Good. Let's get into the real action and start baking.
The Method — Step by Step
- Preheat the oven to 350°F (177°C) and line a 9‑inch springform pan with parchment paper. This ensures the cake releases easily after baking. The oven should be fully preheated before the batter is poured to guarantee even cooking.
- In a medium bowl, whisk together flour, cocoa powder, baking powder, baking soda, and salt until well combined. Sifting the dry ingredients eliminates clumps and ensures a smooth batter. This step is crucial for a fine crumb.
- In a separate large bowl, beat butter and sugar together until pale and fluffy, about 3 minutes. This aerates the batter and creates a light texture. Keep the mixture at room temperature to avoid lumps.
- Add eggs one at a time, beating well after each addition. The first egg should be fully incorporated before adding the second. This ensures a stable batter that holds together during baking.
- Pour in vanilla extract, milk, and heavy cream, then fold in the dry mixture until just combined. Over‑mixing can make the cake tough, so stop as soon as the flour disappears. The batter should be thick but pourable.
- Fold in the tempered chocolate chips and toasted walnuts. The chips should be evenly distributed to avoid clumps. This step adds the signature glossy finish and crunch.
- Pour the batter into the prepared pan, smoothing the top with a spatula. Tap the pan lightly on the counter to release any air bubbles. This creates a level surface for an even bake.
- Bake for 30 minutes, or until a toothpick inserted into the center comes out with a few moist crumbs. The cake’s surface should be firm but still slightly glossy. Remove from the oven and let it cool in the pan for 10 minutes before turning out onto a wire rack.
- While the cake cools, melt the remaining chocolate chips with a splash of heavy cream to create a ganache glaze. Stir until smooth and glossy, then drizzle over the cooled cake. The glaze should pool in the center, creating a decadent waterfall effect.
- Once the glaze has set, sprinkle a pinch of sea salt flakes over the top. The salt will add a subtle contrast and elevate the chocolate’s depth. Let the cake rest for 15 minutes before slicing.
That’s it—you’ve baked a chocolate turtle cake that’s both stunning and delicious. But hold on, I've got a few more tricks that’ll take this to another level.
Insider Tricks for Flawless Results
The Temperature Rule Nobody Follows
Most bakers bake at 350°F, but the best results come from a slightly lower temperature—about 325°F (163°C). This slower bake allows the cake to rise evenly without developing a hard crust. I’ve tested both temperatures and found the lower setting yields a moister crumb.
Why Your Nose Knows Best
Trust your sense of smell during baking. A cake that smells nutty and chocolatey is usually ready. If the aroma is too sweet or chemical, it’s a sign of over‑baking or too much sugar.
The 5‑Minute Rest That Changes Everything
After removing the cake from the oven, let it rest in the pan for exactly 10 minutes. This rest period allows the cake to finish cooking through and prevents it from falling apart when you turn it out. The cake will also be easier to slice cleanly.
Avoiding Lumpy Ganache
When making the ganache glaze, melt the chocolate over low heat and stir constantly. Adding heavy cream too quickly can cause the glaze to seize. Keep the mixture at a gentle simmer, then remove from heat before it starts boiling.
The Secret to a Perfect Finish
Right after the glaze sets, drizzle a thin line of melted chocolate over the top. This creates a glossy sheen that looks professional. It also adds an extra layer of chocolate flavor that pairs well with the walnuts.
Creative Twists and Variations
This recipe is a playground. Here are some of my favorite ways to switch things up:
Nutty Swirl
Replace the walnuts with chopped pecans or hazelnuts for a different crunch. The nutty flavor pairs well with a hint of espresso powder added to the batter. This variation is perfect for coffee lovers.
Spiced Delight
Add a pinch of ground cinnamon and a splash of orange zest to the batter. The warm spices complement the chocolate and add a subtle citrus note. Serve with a dusting of powdered sugar for a festive touch.
Almond Butter Version
Swap half of the butter for almond butter to introduce a nutty undertone. The almond butter also adds moisture, keeping the cake tender. This version is great for those who love nutty desserts.
Vegan Take
Use coconut oil instead of butter, a plant‑based milk, and flax eggs. The cake will still be moist and chocolatey, but with a lighter, tropical twist. This is ideal for guests with dietary restrictions.
Coconut Crunch
Add toasted coconut flakes to the batter and top the glaze with a sprinkle of coconut sugar. The coconut adds a subtle sweetness and a chewy texture that pairs beautifully with the chocolate. It’s a tropical twist on a classic.
Chocolate‑Covered Strawberry Surprise
Layer fresh strawberries between the cake layers before glazing. The fruit’s natural sweetness balances the richness of the chocolate. This version is a show‑stopping dessert for special occasions.
Storing and Bringing It Back to Life
Fridge Storage
Wrap the cake tightly in plastic wrap and store in the refrigerator for up to 3 days. The moisture from the ganache keeps the cake fresh and prevents it from drying out. Let it sit at room temperature for 20 minutes before serving to bring out the flavors.
Freezer Friendly
For longer storage, wrap the cake in parchment, then foil, and place it in a freezer bag. It will keep for up to 2 months. Thaw overnight in the refrigerator, then let it come to room temperature before slicing.
Best Reheating Method
Reheat the cake in a preheated oven at 300°F (149°C) for 10 minutes. Add a tiny splash of water before reheating to create steam, which keeps the cake moist. After reheating, drizzle a fresh glaze for an extra glossy finish.