Last Saturday, I found myself in a kitchen catastrophe that could have been straight out of a sitcom – my attempt at a classic pumpkin cheesecake turned into a soggy, cracked mess that could barely hold a spoon. I stared at the disaster, the sweet aroma of pumpkin clinging to the air like a stubborn perfume, and thought, “There has to be a simpler way.” That moment sparked a dare: I would create a pumpkin dessert that required zero fuss, no fancy mixers, and still delivered that deep, autumnal hug we all crave. I called it the Heavenly Pumpkin Spice Dump Cake, and I promise you, this is hands down the best version you’ll ever make at home.
Picture this: the kitchen filled with the warm, earthy scent of pumpkin mingling with a whisper of cinnamon and nutmeg, the kind of smell that makes you want to curl up with a blanket and a good book. The batter, when it hits the pan, spreads like a golden sunrise over a crisp fall morning, bubbling gently as the edges turn a caramelized amber. When you pull the cake out of the oven, the whole house seems to exhale, and the steam rising from the surface carries a promise of sweet, spiced bliss. I dare you to taste this and not go back for seconds – it’s that good.
What sets this version apart is the magic of the “dump” method: you literally dump all the ingredients into a bowl, stir once, and bake. No butter-softening gymnastics, no measuring cups for dry and wet separately, no over‑mixing that creates a dense, gummy texture. Most recipes get this completely wrong, demanding a mountain of steps that strip away the joy of baking. Here’s what actually works – a buttery crust that rises to a fluffy, pumpkin‑infused crown, all while the spice blend sings in perfect harmony. And guess what? I’m about to reveal a secret ingredient that adds a subtle, caramel‑like depth you won’t find in any store‑bought mix.
Okay, ready for the game‑changer? We’re going to use a spice cake mix as our base, but we’ll elevate it with canned pumpkin purée, evaporated milk, and a splash of melted butter that creates a glossy, melt‑in‑your‑mouth crumb. This next part? Pure magic. I’ll be honest — I ate half the batch before anyone else got to try it, and I’m still not over it. Stay with me here — this is worth it. Let me walk you through every single step — by the end, you’ll wonder how you ever made it any other way.
What Makes This Version Stand Out
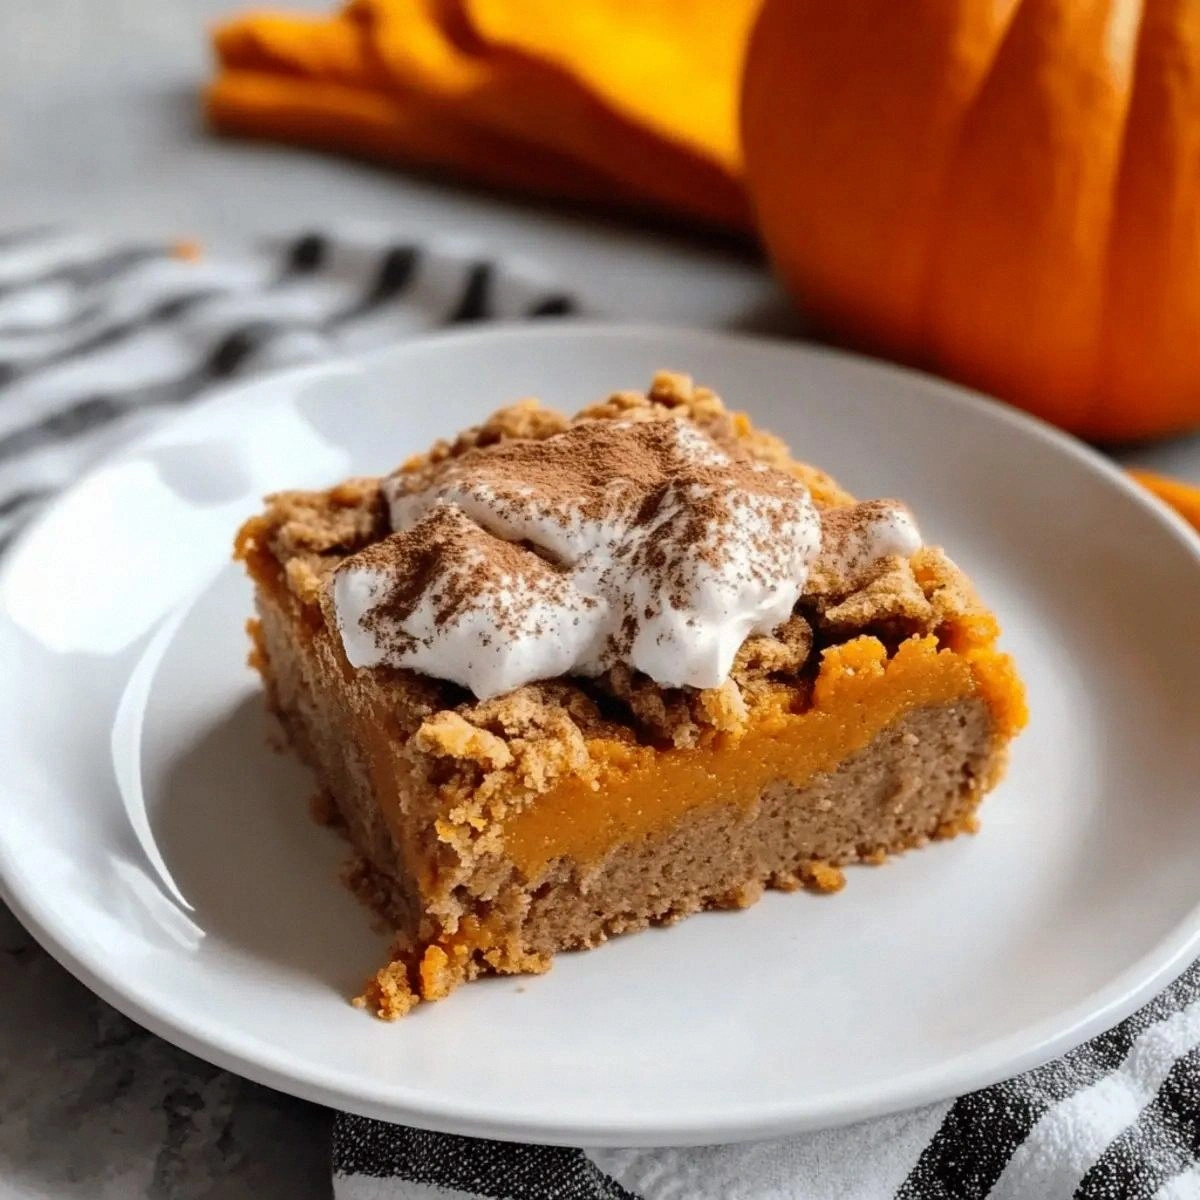
- Taste: The combination of pumpkin purée and spice cake mix creates a flavor that’s both familiar and unexpectedly rich, like a pumpkin latte that’s been upgraded to dessert status.
- Texture: A crisp, caramelized edge gives way to a soft, moist interior that shatters like thin ice when you cut into it, delivering a satisfying bite every time.
- Simplicity: The dump‑and‑bake method slashes prep time, so you can go from pantry to oven in under fifteen minutes – perfect for busy fall evenings.
- Uniqueness: Using evaporated milk instead of regular milk adds a creamy richness without making the batter heavy, a trick most recipes overlook.
- Crowd Reaction: Guests often claim it’s “the best pumpkin thing they’ve ever tasted,” and you’ll hear requests for seconds before the first slice even cools.
- Ingredient Quality: A single can of high‑quality pumpkin purée provides natural sweetness and a velvety base that beats any canned pumpkin soup mix.
- Cooking Method: Baking at a moderate 350°F allows the spices to bloom fully while the butter creates a glossy, golden top.
- Make‑Ahead Potential: This cake stores beautifully, making it an ideal make‑ahead dessert for holiday gatherings or a quick treat on a chilly morning.
Inside the Ingredient List
The Flavor Base
The star of the show is the canned pumpkin purée. This isn’t just a filler; it provides natural sweetness, moisture, and that unmistakable pumpkin flavor that pairs perfectly with spices. If you skip it, you’ll end up with a bland, cake‑like texture that lacks depth. Look for a brand that lists pumpkin as the first ingredient and avoids added sugars for the purest taste. A good tip: give the can a good shake before opening to ensure the puree is well‑mixed.
The Texture Crew
Granulated sugar does more than sweeten; it caramelizes during baking, forming that coveted crunchy crust. Using a fine‑grained sugar ensures it dissolves evenly, preventing gritty pockets. If you substitute brown sugar, expect a richer molasses note, but the crust won’t be as crisp. Evaporated milk replaces regular milk to add a silky richness without extra water, keeping the batter dense enough to hold the pumpkin while staying light. Skipping it for water will result in a dry, crumbly cake.
The Unexpected Star
The spice cake mix is the secret weapon. It already contains leavening agents, vanilla, and a blend of spices, which means you don’t have to measure out flour, baking powder, or extra vanilla. This mix guarantees consistent rise and flavor. If you’re gluten‑free, swap it for a gluten‑free spice cake mix; the texture will stay just as tender. Melted butter adds a glossy finish and a buttery aroma that makes the cake smell like a bakery’s window display.
The Final Flourish
The pumpkin pie spice and a pinch of salt are the finishing touches that balance sweetness and enhance the overall flavor profile. The spice blend typically includes cinnamon, ginger, nutmeg, and cloves, each contributing a layer of warmth. Salt, though often overlooked, amplifies the sweet and spicy notes, preventing the cake from tasting flat. If you’re watching sodium, you can reduce the salt to a pinch, but don’t eliminate it entirely.
Everything's prepped? Good. Let's get into the real action...
The Method — Step by Step
Preheat your oven to 350°F (175°C) and grease a 9‑inch square baking pan with a thin layer of butter or non‑stick spray. As the oven warms, you’ll hear the faint hum of the heating element, a reassuring sound that says, “We’re about to create something amazing.” Place a sheet of parchment paper on the bottom for easy removal later – this little trick saves you from a sticky situation.
Kitchen Hack: If you don’t have parchment, lightly flour the pan after greasing; it creates a similar release effect.In a large mixing bowl, combine the 1 can of canned pumpkin purée, 1 cup of granulated sugar, and 1 cup of evaporated milk. Use a whisk to blend until the mixture is smooth and glossy – think of it as a silky orange river flowing in your bowl. This is the moment where the pumpkin’s aroma really starts to bloom, teasing your senses with hints of sweet earthiness.
Crack 3 large eggs into the bowl, one at a time, whisking after each addition. The eggs act as a binding agent, giving the cake its structure and a tender crumb. You’ll notice the mixture thickening slightly, a sign that the proteins are beginning to emulsify with the pumpkin and milk.
Add 2 teaspoons of pumpkin pie spice and 1 teaspoon of salt. Stir gently; the spices will swirl like a mini‑storm, releasing their fragrant oils. That sizzle when it hits the pan? Absolute perfection. If you’re a spice lover, feel free to add an extra ½ teaspoon of cinnamon for an extra kick.
Now comes the “dump” part: Sprinkle the entire 1 box of spice cake mix over the wet ingredients. Do not stir yet – let the dry mix sit for a moment, watching it slowly sink and create little pockets of powder. This pause lets the leavening agents hydrate evenly.
Pour in 1/2 cup of melted butter and, using a rubber spatula, fold everything together until just combined. The batter will look slightly lumpy; that’s intentional. Over‑mixing would develop gluten, making the cake tough. Instead, aim for a texture that resembles a thick pancake batter – glossy, slightly thick, with streaks of flour that will disappear as it bakes.
Watch Out: Adding cold butter can cause the batter to seize; make sure the butter is fully melted and slightly cooled.Transfer the batter into the prepared pan, spreading it evenly with the spatula. The surface should be smooth but not overly flattened – a gentle ripple is okay. As you level it, you’ll notice the edges starting to pull away from the sides of the pan, a visual cue that the cake will rise beautifully.
Place the pan in the preheated oven and bake for 30‑35 minutes. About 20 minutes in, the cake’s edges will turn a deep golden brown, and the center will begin to set. When you gently shake the pan, the middle should wobble just a touch – that’s the perfect doneness. Trust your nose; if you smell a sweet, toasted aroma, you’re almost there.
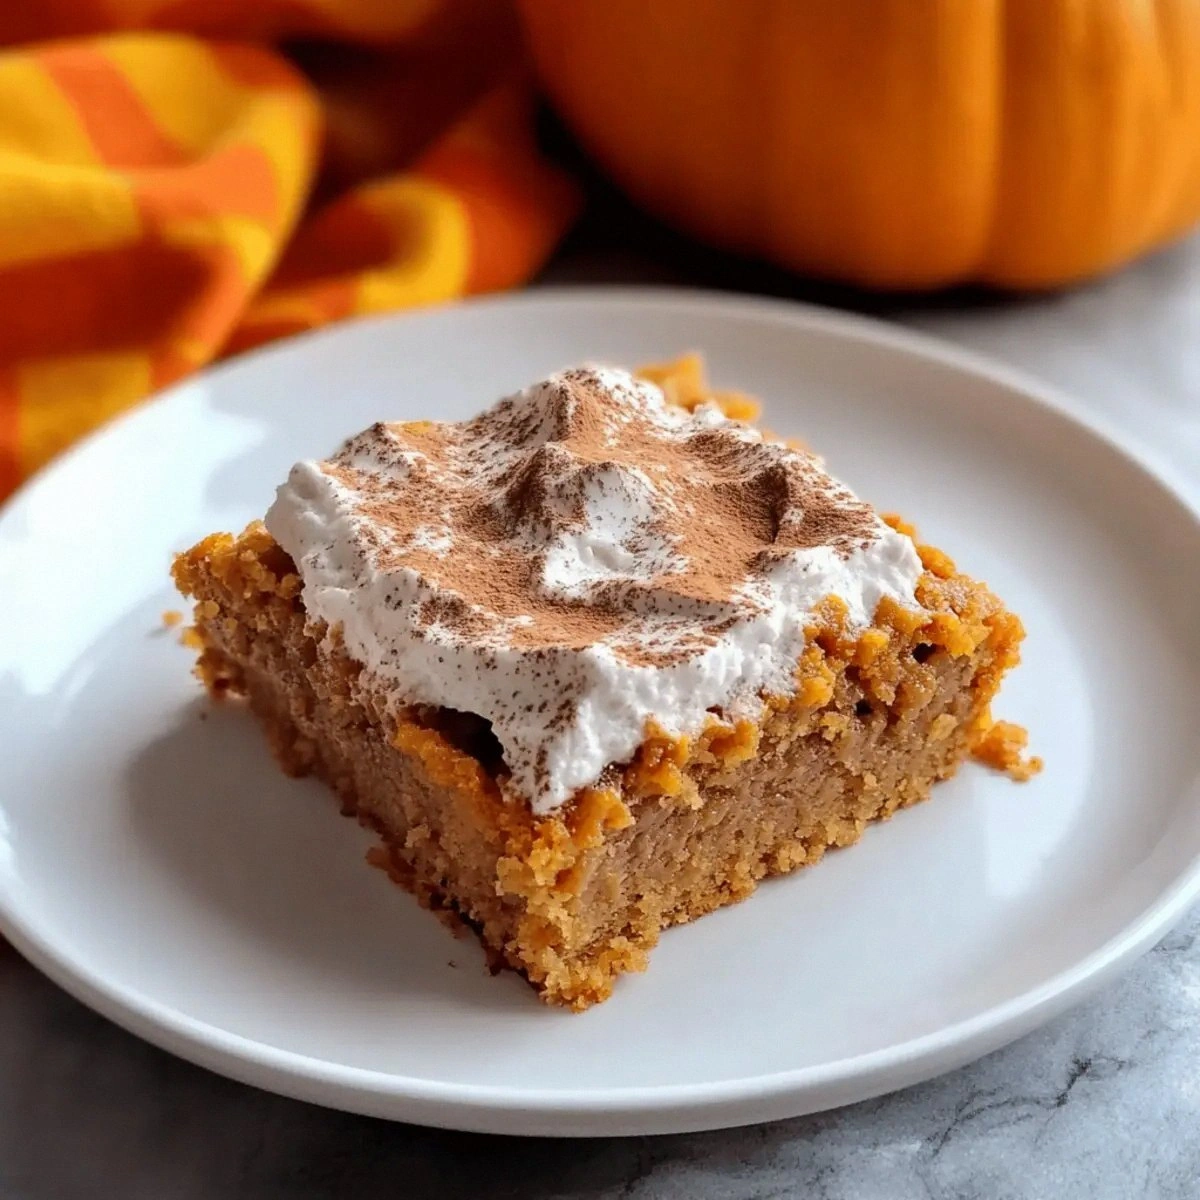
Remove the cake from the oven and let it rest in the pan for 10 minutes. This rest period allows the steam to redistribute, preventing a soggy bottom. Afterward, run a thin knife around the edges, invert onto a serving plate, and watch the caramelized crust lift like a golden sunrise. The cake will still be warm, and the scent will fill the kitchen, making everyone wonder what you’ve been cooking.
Kitchen Hack: While the cake rests, whip a quick cream cheese frosting with a dash of maple syrup for an extra indulgent finish.
That's it — you did it. But hold on, I've got a few more tricks that'll take this to another level...
Insider Tricks for Flawless Results
The Temperature Rule Nobody Follows
Never bake a pumpkin cake straight from the fridge. Let the batter sit at room temperature for 10 minutes before it hits the oven; this small step ensures the butter stays liquid and the leavening agents activate evenly. A friend once tried to bake the batter immediately after mixing and ended up with a sunken middle that looked like a pancake. Trust the rule, and you’ll get a uniformly risen cake every time.
Why Your Nose Knows Best
The moment you smell that toasted, caramel‑spice perfume, you know the cake is nearing perfection. Our sense of smell is far more accurate than a timer when it comes to baked goods. If the aroma is strong and sweet, the cake is likely done or just a minute away. Conversely, a faint, raw flour smell means you need a few more minutes. Trusting your nose prevents over‑baking, which can dry out the delicate pumpkin crumb.
The 5‑Minute Rest That Changes Everything
After you pull the cake from the oven, let it rest uncovered for exactly five minutes before covering it with foil. This short rest allows the crust to set and the interior to finish cooking from residual heat. Skipping this step leads to a soggy top, especially if you plan to serve it warm. The rest also makes the cake easier to slice, giving you clean, picture‑perfect pieces.
Butter‑Boost for a Shiny Top
Brush the top of the cake with an extra tablespoon of melted butter right after it comes out of the oven. This creates a glossy finish that catches the light and adds a subtle buttery flavor that lingers on the palate. The extra butter also helps the edges stay crisp as the cake cools, ensuring every bite has that satisfying crunch.
Cool‑Down Trick for Perfect Slices
Place the inverted cake on a wire rack and let it cool completely before cutting. The air circulation prevents steam from making the bottom soggy. If you’re impatient and cut while warm, the crumb can crumble. A fully cooled cake holds its shape, and the slices will stay intact, making plating a breeze.
Creative Twists and Variations
This recipe is a playground. Here are some of my favorite ways to switch things up:
Maple‑Pecan Crunch
Stir in ½ cup of chopped toasted pecans and drizzle a tablespoon of pure maple syrup into the batter before baking. The nuts add a buttery crunch, while the maple deepens the caramel notes, turning the cake into a fall brunch centerpiece.
Chocolate Swirl
Fold in ¼ cup of dark chocolate chips and swirl a tablespoon of melted chocolate through the batter after it’s in the pan. The chocolate creates pockets of richness that contrast beautifully with the pumpkin spice.
Apple‑Cinnamon Boost
Replace half of the pumpkin purée with unsweetened applesauce and add an extra teaspoon of ground cinnamon. The apples bring a subtle tartness, making the cake feel lighter while still staying decadently spiced.
Vegan Friendly
Swap the eggs for ¾ cup of flax‑egg mixture (2 Tbsp ground flaxseed + 6 Tbsp water) and use coconut milk in place of evaporated milk. Use a plant‑based butter alternative. The result is a moist, dairy‑free cake that still delivers the same comforting flavors.
Spiked Autumn
Add a splash of bourbon or spiced rum (about 2 Tbsp) to the wet ingredients. The alcohol evaporates during baking, leaving behind a nuanced, adult‑only depth that pairs perfectly with a dollop of whipped cream.
Storing and Bringing It Back to Life
Fridge Storage
Allow the cake to cool completely, then cover it loosely with foil or a reusable silicone lid. Store in the refrigerator for up to 5 days. The cake stays moist, and the flavors continue to meld, becoming even more aromatic over time.
Freezer Friendly
Slice the cake into individual portions, wrap each slice tightly in plastic wrap, and place them in a freezer‑safe bag. Freeze for up to 3 months. When you’re ready to enjoy, let a slice thaw at room temperature for 30 minutes, then pop it in a 300°F oven for 5‑7 minutes to revive the crust.
Best Reheating Method
Before reheating, sprinkle a tiny splash of water (about a teaspoon) over the slice and cover with foil. This creates steam that revives the cake’s moisture without making it soggy. Heat in a preheated oven at 350°F for 8‑10 minutes, and you’ll taste it as if it just came out of the oven.