It all started on a rainy Saturday night when my roommate dared me to create a snack that could survive a midnight movie marathon without losing its charm. I was half‑asleep, half‑hungry, and the only thing my brain could conjure up was a vague memory of a cookie‑themed dip that tasted like a dessert and behaved like an appetizer. The kitchen smelled of stale popcorn and burnt toast, a tragic backdrop that begged for a heroic rescue. I grabbed the nearest bag of old‑fashioned oats, a tub of cream cheese that had been lounging in the fridge for days, and a jar of peanut butter that had seen better mornings. The result? A monstrous, gooey, crunchy, and utterly addictive dip that I now call Monster Cookie Cheeseball Dip, and trust me, it’s the kind of dish that makes you question every boring snack you’ve ever known.
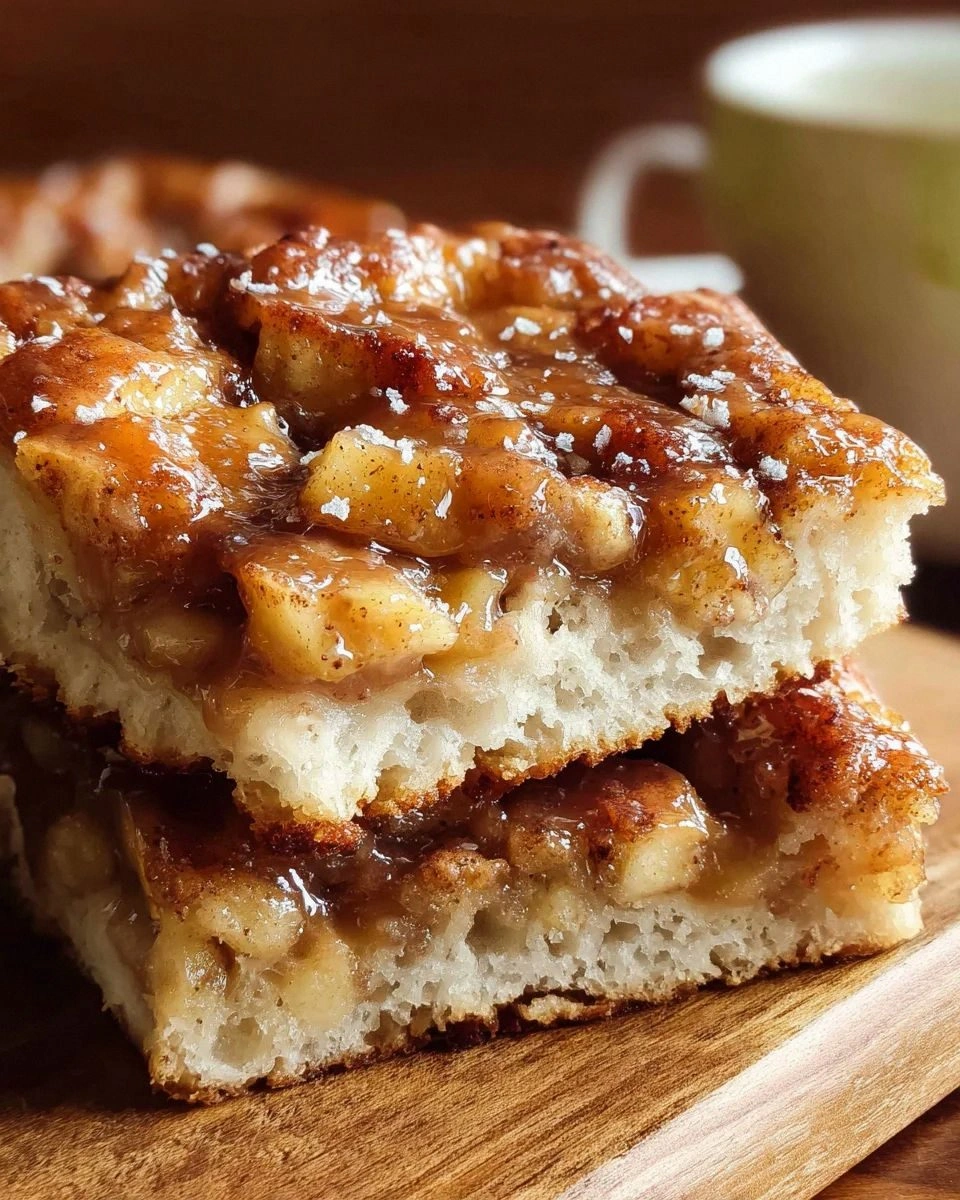
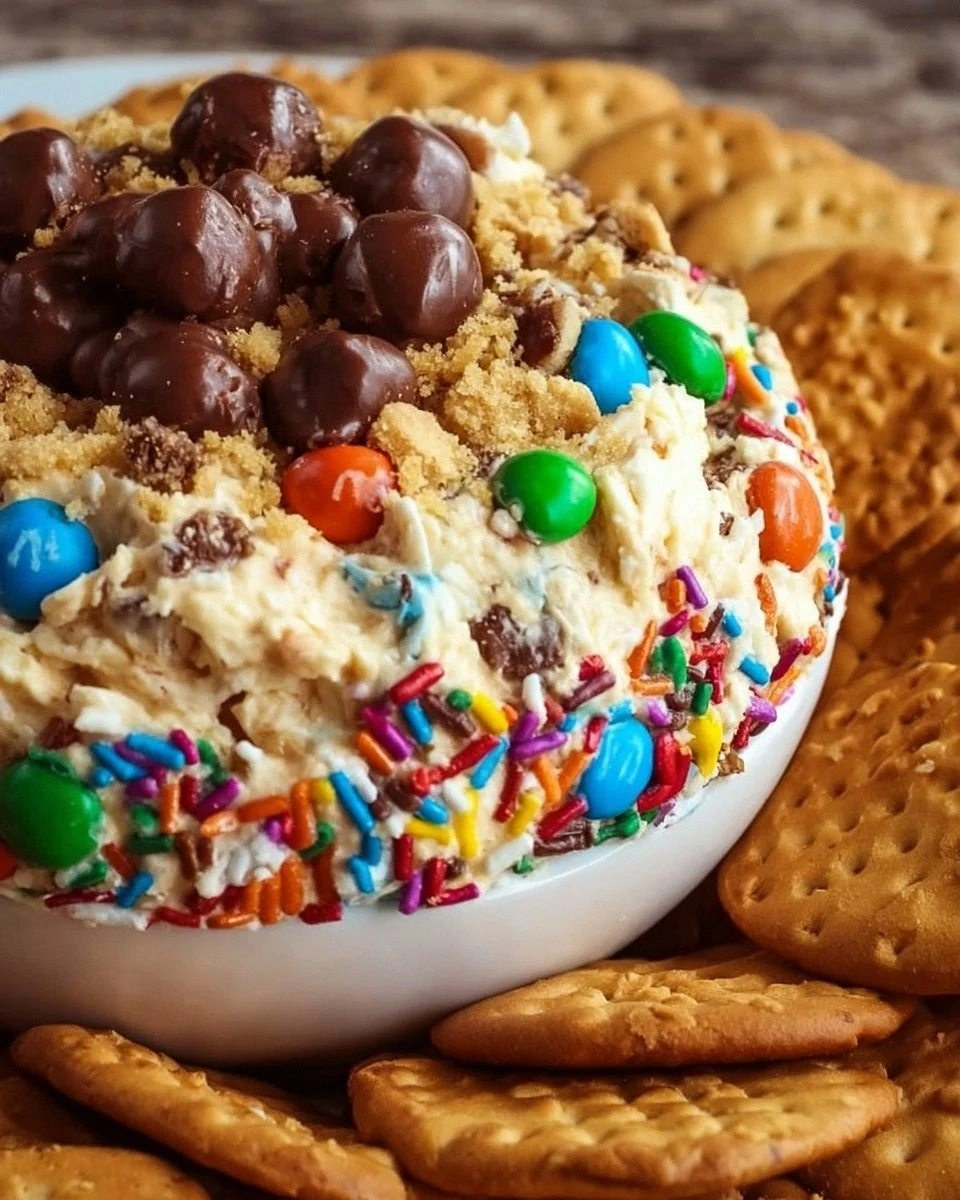
Picture this: a glossy, caramel‑brown sphere that looks like a cookie gone rogue, sitting proudly in the center of a platter, surrounded by an army of graham crackers and fresh fruit slices. The first bite hits you with a creamy, peanut‑buttery core that melts like butter on a hot skillet, while the outer crust crunches with a satisfying oat‑and‑chocolate chip texture that sings in your mouth. The aroma? A sweet, nutty perfume that swirls around the kitchen, coaxing everyone within a ten‑foot radius to the countertop. The sound of the first crunch is like a tiny fireworks display, and the lingering aftertaste is a perfect balance of salty, sweet, and nutty that keeps you reaching for more. I dare you to taste this and not go back for seconds.
Most cookie dip recipes out there either drown the flavor in a sea of sugar or leave you with a bland, soggy mess that clings to the spoon like a bad habit. This version, however, flips the script by using a precise ratio of cream cheese to peanut butter, allowing each bite to stay firm enough to dip yet soft enough to melt on your tongue. The secret is in the toasting of the oats and the careful timing of the chocolate chips, which creates a crunchy shell that holds the creamy heart in perfect harmony. I’ll be honest — I ate half the batch before anyone else got to try it, and that’s a testament to how addictive this dip truly is.
Okay, ready for the game‑changer? I’m about to walk you through every single step — from selecting the right cream cheese to achieving that flawless, glossy finish that makes this dip look as good as it tastes. By the end, you’ll wonder how you ever made a simple dip any other way. Stay with me here — this is worth it.
What Makes This Version Stand Out
- Flavor Explosion: The marriage of creamy peanut butter and tangy cream cheese creates a depth of flavor that’s richer than any store‑bought dip, and the brown sugar adds a caramel‑like undertone that lingers beautifully.
- Texture Mastery: Toasted oats give the outer crust a satisfying crunch, while mini chocolate chips melt just enough to form a glossy coating, delivering a contrast that’s both silky and crunchy.
- Simplicity Meets Sophistication: With only ten ingredients, you won’t need a pantry full of exotic spices, yet the result feels like a dessert you’d order at a high‑end bakery.
- Crowd‑Pleaser: Whether you’re feeding a group of college kids or hosting a family gathering, the dip’s universal appeal makes it the star of any snack table.
- Ingredient Quality: Using full‑fat cream cheese and natural peanut butter (no added sugars) ensures a rich mouthfeel without any artificial aftertaste.
- Make‑Ahead Magic: This dip can be assembled the night before, refrigerated, and still taste as fresh as the moment you made it, perfect for busy hosts.
- Versatile Serving Options: Pair it with graham crackers, pretzel sticks, apple slices, or even celery — the dip adapts to any accompaniment you fancy.
- Visual Wow Factor: The glossy, cookie‑like exterior looks stunning on any platter, turning a simple snack into a conversation‑starter.
Inside the Ingredient List
The Flavor Base
The cream cheese is the backbone of this dip, providing that luxurious, velvety texture that holds everything together. Use a full‑fat version and let it soften at room temperature for at least 30 minutes; this prevents lumps and ensures a smooth blend. If you skip this step and add cold cream cheese straight to the bowl, you’ll end up with a grainy dip that never quite reaches that silky perfection. A good tip is to buy a block of cream cheese rather than the pre‑sliced sticks, as the block is less likely to have added stabilizers.
The peanut butter adds a deep, nutty richness that pairs beautifully with the tang of the cream cheese. Opt for a natural, unsweetened variety — the oil will separate, but that’s a good thing; it means you’re getting pure peanuts without hidden sugars. If you’re allergic or simply not a fan, almond butter works as a swap, though it will shift the flavor profile toward a milder, sweeter note.
The Texture Crew
The old‑fashioned oats are toasted just enough to develop a nutty aroma without turning bitter. This step is crucial: under‑toasted oats will be soggy, while over‑toasted ones will dominate the flavor. Spread them on a baking sheet, drizzle with a tiny splash of melted butter, and toast at 350°F for 8‑10 minutes, stirring halfway. When you hear that subtle “crackle” sound, you know they’re ready.
Mini chocolate chips are the surprise element that creates that glossy, cookie‑like crust. They melt just enough to coat the dip, then set into a thin, crackly shell as the dip cools. If you prefer a different chocolate intensity, use dark chips for a bittersweet edge or white chocolate chips for a sweeter, creamier coating.
The Unexpected Star
The brown sugar brings a caramel‑like depth that balances the salty peanut butter, while the granulated sugar adds a clean sweetness that brightens the overall profile. Using both types of sugar prevents the dip from becoming overly molasses‑y or too cloying. If you’re watching sugar, you can reduce each by a tablespoon, but the texture will be slightly less crisp.
M&M’s or similar candy add bursts of color and a crunchy pop that contrast with the smooth interior. They’re also a fun visual cue that makes the dip look festive for parties. Feel free to swap them for crushed pretzels, chopped nuts, or even dried cranberries for a tart twist.
The Final Flourish
The vanilla extract is a tiny but mighty player, adding a fragrant backdrop that ties all the flavors together. Use a pure vanilla extract rather than imitation; the difference is like night and day when you taste the final product. A splash of vanilla can transform a bland dip into something that feels like a bakery‑fresh treat.
Finally, the graham crackers and fruit slices are not mixed into the dip but serve as the perfect vehicles for scooping. Their mild sweetness and crispness complement the rich dip without stealing the spotlight. Choose fresh, crisp fruit — apples, pears, or even kiwi — to add a refreshing contrast.
Everything's prepped? Good. Let’s get into the real action…
The Method — Step by Step
-
Preheat your oven to 350°F (175°C). While the oven warms up, line a 9‑inch round cake pan with parchment paper, ensuring the paper hangs over the edges for easy removal later. This step may sound trivial, but a well‑lined pan prevents the dip from sticking and makes the final presentation look professional. Feel the heat radiating from the oven — that’s the promise of a toasty crust forming soon.
-
In a large mixing bowl, combine the softened cream cheese and peanut butter. Use a hand mixer on medium speed and beat until the mixture is smooth, glossy, and free of lumps. This is the moment of truth: if you hear a faint “whoosh” as the blades cut through, you know the fats have emulsified perfectly. Power transition: Okay, ready for the game‑changer? Add the vanilla extract, brown sugar, and granulated sugar, then continue mixing until the sugar dissolves and the blend is creamy.
Kitchen Hack: If the mixture looks too thick, add a tablespoon of heavy cream; it will make the dip smoother without diluting the flavor. -
Fold in the toasted oats, mini chocolate chips, and M&M’s. Use a rubber spatula and gently fold until everything is evenly distributed; you want the chips to stay intact, not melt into the batter. The oats should be visible, creating a speckled appearance that hints at the crunch to come. This step is where the dip starts to look like a cookie dough — a visual cue that builds anticipation.
-
Transfer the mixture into the prepared pan, pressing it down firmly with the back of a spoon or a flat spatula. The surface should be smooth and level, as any unevenness will become noticeable after baking. Sprinkle a thin layer of extra chocolate chips on top for an extra glossy crown. The scent at this point is already intoxicating, a blend of toasted oats and sweet chocolate that makes your stomach rumble.
-
Place the pan in the oven and bake for 20‑25 minutes, or until the edges turn a light golden brown and the top looks set but still slightly shiny. Watch Out: Do not over‑bake; the dip will continue to firm up as it cools, and an over‑cooked crust will become brittle and lose its creamy interior.
Watch Out: If the top starts to crack before the time is up, lower the oven temperature by 25°F and continue baking. -
While the dip bakes, prepare your serving platter. Arrange graham crackers in a circular pattern, leaving a small well in the center for the dip. Slice fruit into bite‑size wedges and place them around the crackers for color contrast. This prep step is essential because the dip is best served warm, and you’ll want everything ready to go the moment it’s out of the oven.
Kitchen Hack: Warm the graham crackers for 2 minutes on a low oven rack; this prevents them from getting soggy when they meet the warm dip. -
When the timer dings, remove the pan and let the dip cool in the pan for 10 minutes. This brief rest allows the interior to set while the exterior retains a soft sheen. After 10 minutes, run a thin knife around the edge to release any clingy bits, then gently lift the parchment paper to reveal the perfectly formed cheeseball.
-
Transfer the cheeseball onto the prepared platter, positioning it in the center of the graham cracker ring. Drizzle a thin stream of melted chocolate over the top for an extra glossy sheen if you’re feeling fancy. Finally, sprinkle a pinch of sea salt on the surface — this tiny contrast amplifies the sweet flavors and adds a sophisticated finish. Picture yourself pulling this out of the oven, the whole kitchen smelling incredible, and everyone gathering around the table.
-
Serve immediately while warm, or cover loosely with foil and keep warm in a low oven (200°F) for up to 15 minutes. The dip stays luscious and dip‑ready, and the crackers stay crisp. That’s it — you did it. But hold on, I’ve got a few more tricks that’ll take this to another level…
Insider Tricks for Flawless Results
The Temperature Rule Nobody Follows
Never bake the dip straight from the fridge; always bring the mixture to room temperature before baking. The reason is simple: a cold batter will cause uneven cooking, leading to a soggy center and a hardened exterior. I once tried to speed things up by tossing the bowl straight into the oven, and the result was a dip that resembled a rubbery pancake. Letting the batter sit for 15 minutes after mixing ensures an even rise and a uniform texture throughout.
Why Your Nose Knows Best
Trust the aroma as your ultimate indicator of doneness. When the oats turn a deep golden brown and you catch that nutty, toasted scent, you’re right on the money. If you rely solely on a timer, you might over‑bake, losing that delicate balance between soft interior and crisp shell. The next time you bake, close your eyes for a moment, inhale deeply, and let the smell guide you.
The 5‑Minute Rest That Changes Everything
After the dip comes out of the oven, resist the urge to slice it immediately. Letting it rest for exactly five minutes allows the internal steam to redistribute, creating a smoother surface and preventing cracks when you move it. During this short pause, the chocolate chips settle into a perfect glaze, and the oats firm up just enough to hold their shape. Skipping this rest is a common mistake that leads to a crumbly dip that falls apart on the plate.
Secret Sweet‑Salt Balance
A pinch of flaky sea salt sprinkled on top right before serving does wonders. It amplifies the chocolate, brightens the peanut butter, and adds a sophisticated edge that makes the dip feel upscale. I once served a batch without any salt, and the feedback was “good, but missing something.” The next round, a light dusting turned the dip from good to unforgettable.
Serving Temperature is Key
Warm dips are more aromatic and have a silkier texture, but if the dip cools too much, it becomes dense and hard to scoop. Keep a small warming tray or a low‑heat oven nearby if you’re serving a crowd. A quick 2‑minute reheat at 200°F restores that luscious melt‑in‑your‑mouth quality without over‑cooking the outer crust.
Creative Twists and Variations
This recipe is a playground. Here are some of my favorite ways to switch things up:
Nutty Banana Blast
Swap half of the peanut butter for mashed ripe banana and add a handful of chopped walnuts. The banana adds natural sweetness, reducing the need for extra sugar, while walnuts contribute a buttery crunch. Perfect for those who love a hint of fruit in their desserts.
White Chocolate Raspberry Dream
Replace mini chocolate chips with white chocolate chips and fold in a tablespoon of raspberry puree. The tartness of the raspberry cuts through the richness, creating a bright, festive flavor that’s ideal for spring gatherings. Garnish with fresh raspberries for an extra pop of color.
Spicy Mexican Mocha
Introduce a pinch of cayenne pepper and a teaspoon of espresso powder into the mixture. The heat from the cayenne pairs surprisingly well with the chocolate, while the espresso deepens the chocolate flavor, giving the dip an adult‑only twist. Serve with churro sticks for an indulgent Mexican‑inspired snack.
Vegan Delight
Use a plant‑based cream cheese (such as almond or cashew based) and swap peanut butter for almond butter. Replace the chocolate chips with dairy‑free dark chocolate chips. The texture remains creamy, and the flavor stays robust, making it suitable for vegans without sacrificing any of the magic.
Holiday Peppermint Crunch
Add crushed peppermint candies to the M&M’s mix and drizzle a thin line of melted white chocolate over the top after baking. The peppermint adds a refreshing coolness that pairs beautifully with the warm, nutty base, perfect for holiday parties.
Storing and Bringing It Back to Life
Fridge Storage
Cover the dip tightly with plastic wrap or store it in an airtight container and keep it in the refrigerator for up to 5 days. The chill will firm up the interior, but the dip remains scoopable when brought back to room temperature. Before serving, let it sit out for 20‑30 minutes to regain that creamy texture.
Freezer Friendly
If you want to make a batch ahead of time, freeze the dip in a freezer‑safe container for up to 2 months. Thaw it overnight in the refrigerator, then let it come to room temperature. To restore the glossy crust, place it in a preheated oven at 300°F for 8‑10 minutes, adding a tiny splash of water to the pan to generate steam and revive the texture.
Best Reheating Method
The optimal way to reheat is a gentle, low‑heat approach: set your oven to 250°F, cover the dip loosely with foil, and heat for 10‑12 minutes. Add a teaspoon of water to the bottom of the pan; the steam will keep the interior moist while the outer crust regains its crunch. Avoid microwaving, as it makes the dip rubbery and uneven.